





5 Tips to Making The Most of Your Greenhouse Garden

0

Every spring, sales for greenhouses always go through the roof. That’s because successful gardeners have discovered the advantages of having one of these nifty contraptions in their own backyards. While others are struggling with cold, wet soils or draughty northern winds, greenhouse gardening lets you raise your potted plants throughout any season.

They let you grow flowers and vegetables for longer seasons, assuring you a reliable harvest. Even the smallest greenhouse can have an important role to play in any garden. And if you have a large range of tasks to achieve, the bigger ones can let you potter around in comfort. It is also the best way for gardeners who are just starting out to test the waters.

With that in mind, here are 5 tips that can help you make the most of your greenhouse garden in any season:

  1. Site it in the Sun

It is incredibly important to find the optimal spot for your greenhouse. Ensuring that it receives sunlight on all sides is vital. If your greenhouse is long and narrow, then placing it in an east-west orientation is the best choice. Also, keep it away from any structures that can cast a shadow over it including fences, walls, hedges, and any buildings. And, of course, avoid placing it under any trees.

  1. Provide Good Heating

Believe it or not, greenhouses are very inefficient at holding on to heat. And we all know that heat is a critical factor when cultivating plants in one. You can keep it unheated and rely solely on sunshine, which is a free and renewable resource. But if you must use a heat source, go for an electric one. That’s because they create better-growing conditions in your greenhouse.

It’s also important to keep an eye on the temperature within the structure. Too much heat in a short period of time can kill delicate plants. So invest in a thermometer to help you keep track.

  1. Don’t Forget About Ventilation

All greenhouses need a good ventilation system. That’s because vents let any hot, rising air to move out while allowing cooler air in. This is especially important for summer months when the temperature tends to rise to very high levels.

You can find out the optimal number of roof vents that your greenhouse needs from the manufacturer. Also, invest in louvers to draw in air at the base of your structure and ensure a steady flow of air. This will help create better-growing conditions in your greenhouse. If you tend to be away from home during the day, fit in automatic openers to get this done.

  1. Solve the Watering Problem

For many people, investing in greenhouse plumbing is a luxury. So you can turn to more sustainable practices to solve the watering problem. You can harvest a surprising volume of rainwater using your structure’s roof and store it in nearby tanks. You can then use a watering can to keep your plants watered. And if you’re away from home a lot, you could invest in a semi-automatic watering system.

The best time to water your plants is in the evenings. This is the best way to keep evaporation down and ensure that your plants absorb more water and eliminate waste. You can also place stone or marble chips on your greenhouse floor to keep the humidity up, ensuring that your plants thrive.

  1. Check for Pests

Before leaving your greenhouse every evening, take time to check for any evidence of pests like snails and slugs. These critters can wreak massive damage on your plants without you noticing before it’s too late. It’s a good idea to try organic remedies like nematodes to help preserve the fragile ecosystem in your greenhouse.

The top 4 reasons to invest in a turf lawn

0

Every homeowner is always thinking of ways to improve the look and feel of their home. It’s not just about the interior but also the outside of the house. One of the things that adds value and beauty to the house is a well maintained lawn. But the problem is that there are some who do not have the time to plant and maintain their lawn all year round. A great alternative will be to invest in a turf lawn instead. It is a sound investment when you think about all the benefits you’ll be getting. Take a look at the list below for reasons on why you should invest in a turf lawn today.

 

  1.    It’s very easy to install – you might think that it would be hard to install a turf lawn, and while it may require some effort, it is fairly easy to do. You only need to do some measuring and find ways to secure the artificial grass on your lawn. The good thing is that there are some companies who are willing to do that for you won’t have to exert so much effort.
  2.    You get to save money – sure you make an initial investment in the turf lawn, but after that, there is very little you need to pay for. How do you save money when you buy a turf lawn? First is the cost of watering. There is no way you will be able to maintain a green and lush lawn if you do not water it regularly. An artificial lawn does not need regular watering so you’re already saving a lot of money with that. You also do not need to purchase a lawn mower or get the services of professionals just to keep your lawn healthy and clean.
  3.    It’s very low maintenance – another great thing about artificial grass is that it is very low-maintenance. Unlike real grass where you would need to mow it regularly. Real grass also requires maintaining other than watering it or mowing it. Because grass is also prone to getting pests, weeds, and fungi, you also need to be on watch for that. If you’re a hands-on owner, you would want to do this yourself, which means you need to make a lot of effort. But if you do not have the time, you will still need to spend money to hire someone to do it for you. With artificial grass, it does not need to be trimmed and you only need to clean it occasionally to ensure that it looks well.
  4.    It’s allergy-free and pet-friendly – if you have a pet, cleaning up their poop is a breeze when you have an artificial lawn. Aside from that, if anyone from your family suffers from an allergy, you don’t need to worry about that with a turf lawn. Since there will be no pollen getting in the house, they will not suffer from allergies.


If you are interested in getting a turf lawn for your house, Crown Artificial Turf can guarantee the best service for the best prices. They are professionals and have a lot of experience so you can be sure that you will get your money’s worth

.


Cyperus Plant

0

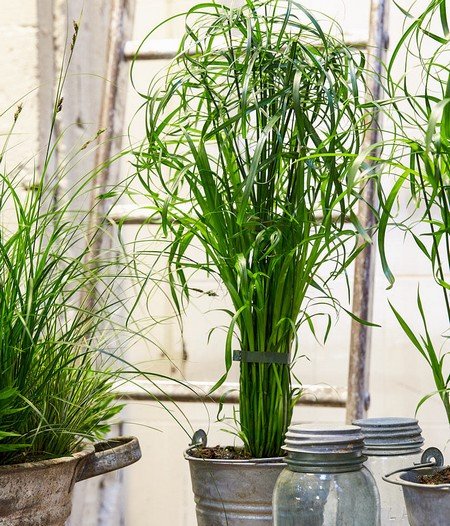
Cyperus Plant – lt is easy to see why Cyperus is called the Umbrella plant. The grassy leaves, ranging from hair-like to quite broad depending on the species, radiate from the stiff stalks like the ribs of an open umbrella. There is just one golden rule for success with these  plants – keep the roots constantly wet. Place the  pot in a saucer or outer container which should always contain water.

The plant is grown for its overall shape rather than the beauty of its foliage – the tiny green and brown flowers are of little decorative value. Cyperus is best grouped with other plants or grown in a bottle garden; choose one of the dwarf-growing types if space is limited.

Cyperus5

Cyperus alternifolius ‘Zumula’

Cultivation is straightforward – pests are rarely a  problem and it is easy to propagate. Cut out  yellowing stems to encourage new growth. 

Types of Cyperus

Cyperus papyrus (5-8 ft) is an interesting plant as it was the source of both paper and Moses’ cradle in biblical times, but it is too tall and difficult for most homes. The popular one is C. alternifolius which bears long and narrow leaves and grows about 3 ft tall when mature. There are several attractive varieties, including the white-striped C. variegatus and the dwarf (1-1 ½ ft) Cyperus gracilis. Another compact  type is C. diffusus which is easy to find – the 1 ft C. esculentus which produces Tiger nuts underground is much more difficult to obtain. The showiest flower-heads are borne by C. haspan.     

Cyperus3

   Cyperus alternifolius

Secrets of success

Temperature: Not fussy, but keep at 50°F or above in winter. 

Light: Well-lit or light shade, but avoid direct summer sunlight 

Water: Keep compost soaked and restrict free drainage. 

Air humidity: Mist leaves frequently. 

Repotting: Repot in spring every year. 

Propagation: Divide plants at repotting time.

Cyperus4

Cyperus2

Cyperus

Cyperus1

C. papyrus

How To Improve Your Soil By Adding Lime

0

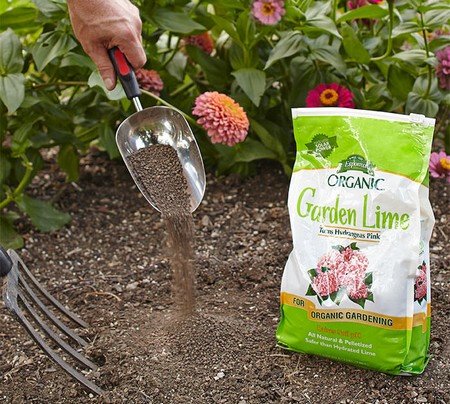
How To Improve Your Soil By Adding Lime – Rain steadily washes lime out of your soil at an average rate of ½ oz per sq. yd. Slowly the land becomes more sour, and neither humus-makers nor the majority of fertilizers are of any help in correcting this condition. The answer is to apply lime – the oldest and still the best soil conditioner.

– Lime neutralizes sourness. Very few garden plants grow well under acid (sour) conditions.

– Lime brings life into your soil. When soils are sour, beneficial bacteria and earthworms tend to die out. Lime helps them to flourish.

Lime

– Lime breaks up heavy clay soil. Lime binds the tiny clay particles together into ‘crumbs’ and so makes heavy soils easier to work, warmer, and better draining. You can prove for yourself this property of lime. Add a teaspoonful of clayey soil to a glass of water and stir until it is all in suspension. When you stop stirring, the liquid will remain muddy because the minute particles of clay are not heavy enough to fall to the bottom of the glass. Not stir in a ¼-teaspoonful of hydrated lime. The clay particles group together into clearly visible soil crumbs, which quickly sink to the bottom of the tumbler.

– Lime is a plant food. Calcium, the main component of lime, is an essential nutrient for all plants.

Lime2

– Lime makes other plant foods available. Lime acts on humus, setting free the elements needed for healthy plant growth.

– Lime discourages pests. Some soil diseases (club root, for example) are checked by liming. Soil pests such as slugs, leatherjackets and wireworms hate it.

How much to lime?

Your garden can have too much of a good thing. If an excessive amount of lime is used, humus breaks down too quickly and plant leaves turn yellow because of the lock up of iron in the soil. It is easy to avoid overliming by testing your soil and applying these rates.

Lime0001

When to lime?

The best time to add lime to the soil is after digging, in fall. If fall manuring has been carried out, postpone liming until February. Spread the powder evenly over the surface, leaving rain to carry it down into the soil.

Vegetable plot: Lime every 3 years. If you follow a crop rotation, lime the plot which is intended for the cabbage family. Do not lime land which is to be used for potatoes.

Flower garden: Lime every 2 years on sandy soils, and every 3 years on heavy soils and loam.

Remember that lime likes to be alone, so do not mix it with other soil dressings. To avoid the loss of plant foods, lime should not be applied until at least 2–3 months after manuring, and 1 month after fertilizers.

Manures, composts, fertilizers and seeds can safely be added to the soil one month after liming.

Cacti Will Beautify Every Your Room

0

Cacti Will Beautify Every Your Room – When people think about cactus they generally think about parched deserts and large spiny cacti growing under the hot sun as seen in old westerns movies. But the cactus is not a plant only for desert conditions. There are many varieties that do well in hot climates with little water but there are also many that have been propagated for indoor use.

Cacti are low maintenance and drought resistant and can make an ideal indoor plant for just about anyone, including those not blessed with a green thumb.

The biggest threat to cactus is over-watering which will often result in disease, fungi gnats, and rot. When watering, the soil should be saturated completely and all excess water removed. Keep an eye on the foliage to check for any soft areas and have a natural fungicide on hand when you suspect pests have taken up residence.

Cacti5

Though they require very little care, there are a few rules to keep in mind to keep your cacti thriving

Cacti are succulents, which mean they are adept at storing water. They are a perfect for those who have busy lives and a watering schedule is not a priority. Though watering is done less often it is important to water consistently even when they are in their dormant stages. Each type is different but generally every 3 weeks is plenty.

Cacti1

Sunlight and plenty of it. Cacti need ample direct and filtered sunlight depending on the variety to thrive. Artificial lighting such as fluorescent can be used as well where sunlight is in limited supply. You can move your cactus to several sunny locations within your home, however keeping it cool when it is in its dormant stages makes for a sturdier plant.

Depending on the type of cactus it may need to be move to a cooler location with less light to encourage it to ‘winter’. This will promote flowering when it comes out of its dormant stage. Cacti thrive well in just about any container, but a clay pot is best overall as it encourages quick water evaporation and prevents excessive soil saturation. Whatever container used, it’s important that it have an effective drainage system to prevent rot.

Cacti2

Re-potting regularly in larger size pots as they grow keeps roots healthy and aerates the soil. Adding fresh soil regularly helps introduce more nutrients for better growth.

Cacti need fertilizer, as do all plants and there are many types to available to choose from. Research your plants to determine the most suitable and when is the best time fertilizer should be applied.

Fortunately for many, cacti are very tolerant to imperfect conditions. As long as you provide the best conditions for the plants you have, the cactus will do the rest.

Cactus

Cacti3

Cactus1

Cacti4

Planting In Hypertufa Containers

0

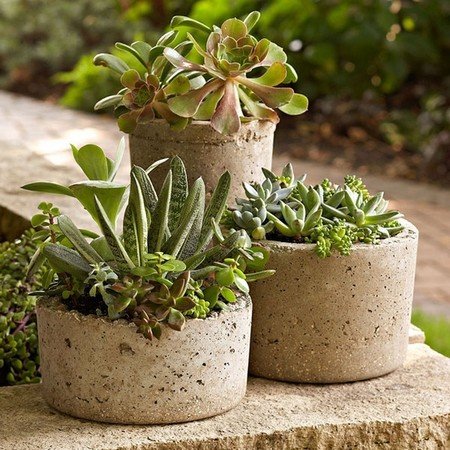
Planting In Hypertufa Containers – Hypertufa is a mixture of cement, sand and peat that you just mix up and slap on. A coating of hypertufa is a great way to make a whole lot of tatty old pots instantly match. Turn a grotty dark damp garden into a romantic grotto in just a few hours by coating a breeze-block wall with craggy hypertufa and teaming it with a collection of tufa-clad containers –  looks lovely planted up with a few fern and hostas, for example.

Hypertufa4

Because it looks like natural stone, the sort of things that look really good with tufa are slightly wild-looking plants like ferns, rock plants, and some shrubs or conifers. Bedding plants and smart flowers look totally wrong!

Rock plants. A big group of rock plants looks great in a large stone-effect container or a huge craggy trough. For single pots, choose drough-proof plants and grow one kind per hypertufa container, so you get a big mound of knobbly houseleek (sempervivum) or a thick tuft od sea-thrift.

Grassy plants. The little black-leaved grassy-looking plant Ophiopogon planiscapus ‘Nigrescens’ is brilliant in a medium-sized hypertufa container, or try Acorus gramineus ‘Variegatus’, which has fans of green and gold striped foliage. Any of the festucas, which make blue tussocks, are good in pots too.

Conifers. Choose naturally craggy-shaped ones that look almost like bonsai trees. Grow one per pot. Junipers and pines are the safest conifers to grow in pots if you tend to forget to watering, as they are fairy drought-proof. And you can get some beautiful dwarf varieties of both if you only want to use small pots.

Trees. Japanese maple, pictured, is a really good small tree for a pot – You get structural shapes and good foliage, and most kinds have great fall color. They even look good in winter, because after the leaves have fallen off you can see the ‘skeleton’ of twigs.

Hypertufa2

Rock plants in large hypertufa pot

Hypertufa3

Hypertufa wall pots

Hypertufa6

Hypertufa moss fern planter

Hypertufa

Small hypertufa planters

Hypertufa5

Gardening Techniques: Grafting And Budding

0

Gardening Techniques: Grafting And Budding – A graft is a union between two plants, the roots and lower stem (the stock or rootstock) of one plant uniting with the shoot of another plant (the scion), so that they grow together as one. The main role of grafting in horticulture is the propagation of trees and shrubs where one or more of the following difficulties prevent easier means of producing planting material: 

Grafting2

– Varieties which root slowly or not at all from cuttings or by layering. 

– Varieties which do not set seed. 

– Varieties which do not breed true from seed. 

– Varieties which are unsatisfactory when  grown on their own roots. 

A mystique has grown up about grafting, but the  principle is very simple. The stock and the scion must be  related — as a general rule the chance of a successful union increases in direct proportion to the closeness of the relationship. Next, there must be physical close contact — it is the thin living layer below the bark which has to knit together.

Grafting1

Timing is important — the plants  should be just starting to grow after their winter rest, and  the union must be protected. This calls for binding with raffia, plastic tape or an elastic tie and then covering the whole area with grafting wax. This will prevent both drying out and infection from air-borne spores. 

Although the principle is simple, a large number of  systems have evolved over the centuries — saddle  grafting, rind grafting, approach grafting, splice grafting and so on. The most popular method is whip and tongue grafting. The stock and scion should be approximately the same thickness — remove the binding material once the graft has taken and new growth has appeared.

Grafting

Cacti are the easiest group of plants to graft. All you have to do is to cut the base of the scion in the form of a V. Cut  a corresponding V at the top of the stock and push the two grafts together. Push a few pins or thorns through the union and leave the rest to nature. 

Commercial roses are generally propagated by budding — a form of grafting which is carried out in  midsummer rather than early spring. A bud or ‘eye’ of the selected variety is inserted into a T-shaped cut made in the stem of the rootstock — close to the ground for a bush or some distance up the stem for a standard.

Budding

Thanksgiving Dinner Table Décor To Help You Entertain In Style

0

With Canadian Thanksgiving on the horizon, decorating lovers will soon be adorning their homes with all manner of seasonal décor. Whether you’re hosting the family dinner of the century or simply hosting a “Friendsgiving” with your closest pals, the autumn holiday offers a chance to unwind. Staying true to the nature of the season, Thanksgiving also gives us the opportunity to invigorate our homes with gorgeous decorative accents. Here are a few easy ways to embrace the occasion through your interior design.

Photo: a.l.e.k.s_g on Instagram 

Classic plaid: Before you tuck into a sumptuous feast, try adorning your wooden dining table with a tartan tablecloth. Meanwhile, miniature pumpkins and scented candles help to further transform your decorating scheme. Be sure to create an eye-catching centrepiece with all manner of gourds and faux leaves, in order to truly capture the spirit of Thanksgiving.

Photo: agirlofmanywords on Instagram

White and green: Although the thought of a festive fall weekend may bring the idea of rich orange and brown tones to mind, white and green are just as gorgeous. Try adorning your Thanksgiving table with green gourds and chic white pumpkins. For a finishing touch, white ceramic dishware and metallic gold candle holders complement these accent colours.

Photo: obiwoncnolby on Instagram 

Dried florals and hints of orange: Once you’ve set the table with an orange, white and brown plaid tablecloth, take your decorating one step further. From dried sunflowers placed expertly in a crystal vase to orange porcelain bowls, the indulgent colours of the season can inspire the ultimate setting.

Runway Inspired Florals Are A Big Interior Design Trend

0

Photo: joyfulhomecompany on Instagram 

Although splashy, grandma-esque florals were spotted on the Fall 2017 runways, these beautiful blooms are not just for your wardrobe anymore. As temperatures cool and we prepare to transform our humble homes into cozy autumnal havens, there’s nothing quite like flowery prints to revamp your space. Far from the overly girly, preppy pastels of summer, autumn florals for the home are beautifully crisp and sharp. Here are a few inspired looks from Instagram, sure to suit your decorative tastes.

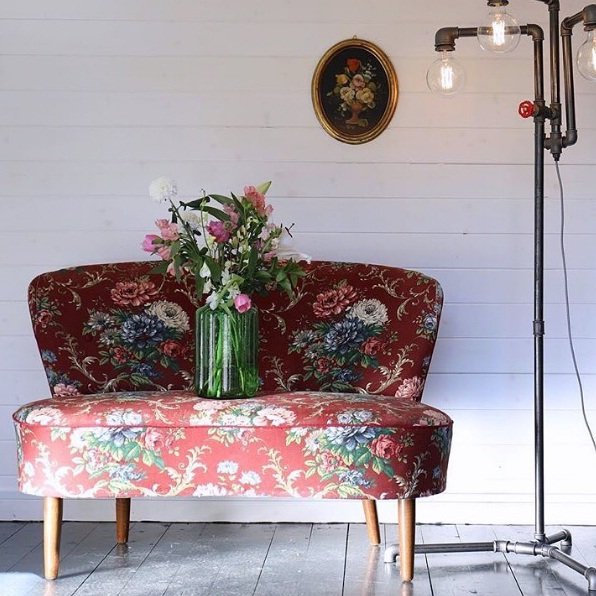
The grandma couch: There’s nothing like a grandma couch to transform a front porch or front room into an artistic escape. We are loving this particular example, which features brightly coloured red, white and blue blossoms on red upholstery. To truly allow the flowers to pop, turn to a crystal or glass vase filled with fresh roses and tulips.

Photo: kenisahome on Instagram 

Hawaiian prints: As the weather gets colder, try warming up your home with tropical patterns. The look of a white and red Hawaiian motif can brighten up your shower curtains, along with printed pillows and a cushy armchair.

Photo: unitexrugs on Instagram 

Plum tones: For a rich, seasonally appropriate take on florals, try integrating plum and deep violet shades into your design palette. The look of a flowery carpet can brighten a living room space, with a red velvet sofa for a finishing touch. Add a decorative flamingo, framed artwork and printed accent cushions to seal the deal.

Matte Black Décor Is The Edgy New Trend In Interiors

0

Photo: tuckplumbing on Instagram 

If you’ve been looking for a sleek and exciting new way to decorate your home, try turning to matte black décor as a solution. There’s nothing quite like a smooth surface to accentuate your minimalist design, and bring sophistication into your overall space. While high gloss finishes were once en vogue, the look of matte furnishings is understated and refined. From your bathroom to your living room, here are a few ways to decorate with black matte this season.

Black shelving units and marble walls: Try redecorating your bathroom with streamlined and slender black shelves to store all your towels and shampoo bottles. Meanwhile, a white porcelain sink and neutral marble walls all help to pull your overall design together flawlessly.

Photo: tuckplumbing on Instagram 

Chic bathroom sinks and matching bathtub: Other than shelving, replacing your standard ivory tub and sink can help to usher matte black into your bathroom. The look of a black matte basin and a coordinating freestanding tub also help to bring the design aesthetic to life.

Photo: theroyalrundown on Instagram 

Matte walls and an ornate fireplace: To truly incorporate the look of black matte décor into your living room, paint a statement wall in a rich black shade. For a finishing touch, an intricately detailed black fireplace is the way to go. Contrast your overall décor with a brown leather armchair and ottoman, for a luxurious feel.

Throw Blankets Are The Easy Way To Decorate Your Space

0

Photo: accents_home_decor on Instagram 

With the temperatures dropping rapidly and the weather changing before our eyes, it’s officially time to layer up in a throw blanket at home. Whether you’re hosting guests at home this month or simply looking to decorate your space in true seasonal form, try turning to a cozy throw as a solution. We’ve curated a few decorating ideas which will allow you to bring this autumn staple into your humble home.

Grey and mauve: For a soft and simple colour palette, turn to subtle and sweet shades of grey and mauve to complete your space. The look of fluffy ivory, pale mauve and cream cushions can flatter a dove grey throw blanket. Turn to fresh flowers, a slender white coffee table and a neutral colour scheme to truly emphasize the soft tones of the throw.

Photo: loomandmarket on Instagram 

Pink and white: Turn to softness and femininity as you accessorize your living room this season. Place a shaggy white blanket on a wicker chair, and add printed pillows and a pale pink cushion. The sweet pastel tones help to create a relaxing, sanctuary like environment, right at home.

Photo: 99seaview on Instagram 

Neutral tones: If you prefer minimalism to colour, try decorating a cream-coloured or off-white sofa with knitted throws in neutral tones. Shades of ivory, grey, beige and brown can complement a light-coloured couch perfectly. Meanwhile, a patchwork pattern turns up the visual interest and can bring an otherwise mild colour palette to life.

Decorate With Distressed Wood This Season

0

For anyone wondering how to decorate their homes for the season ahead, there’s nothing quite like distressed wood to bring new life to your humble abode. Although this design trend was once considered rustic, it is now officially cool and a perfect way to upgrade your city slicker pad. If you want to adorn your space with distressed wood, look no further than these examples spotted on Instagram.

Photo: impechomeupgrades on Instagram 

Reclaimed wood floors and wooden shelves: Try upgrading your space with stained, reclaimed wood flooring to bring a farmhouse, country feel to your house. The look of a linen tablecloth, buttery yellow blossoms in a glass vase and chic distressed wooden shelving helps to complete the overall décor.

Photo: kitchentablesandmore on Instagram 

Wooden table and chairs: For anyone wondering how to restructure their décor, try turning to a distressed wooden table and matching chairs. Add a shaggy area rug, framed wall art and printed curtains for a finishing touch.

Photo: earlydawn22 on Instagram

Stained wood and brick: Integrate wood and brick together into your dining room, for a funky and modernized take on decorating. Meanwhile, greenery, wall photographs and a textured wooden shelf can bring visual interest to your space.