




Choosing Plants For Fall Colorful Garden

0

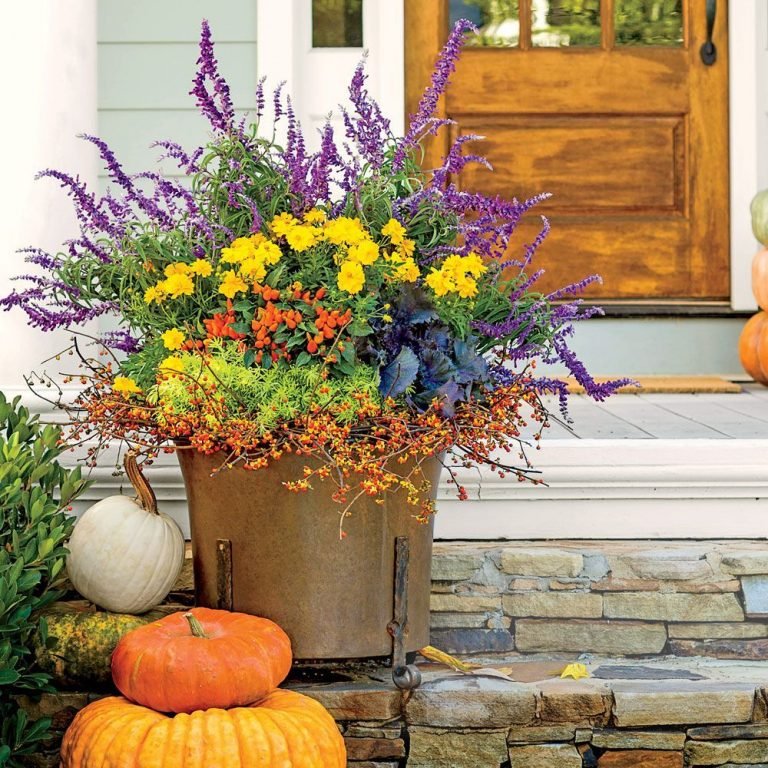
Choosing Plants For Fall Colorful Garden – Many say that fall is the best time to plant vegetables and herbs, but what if you want your garden to look great with colorful flowers instead of veggies and other edibles? Don’t worry, here are some of the best perennial flowers that you can plant in your garden to fill it with jewel-tone shades at the end of the season. Unlike spring and summer, when seeds thrive, fall gardens work best when they start with young plants rather than seeds, which may not be able to germinate before the first frost. Each season has its stars and fall flowering perennials have some of the best. Fall flowers are just as beautiful as spring and summer flowers and there are plenty of beautiful fall flowers to brag about.

Many fall flowers such as Chrysanthemums and goldenrods live best in the cooler weather as do asters, Japanese anemones, petunias, Michaelmas daisies, autumn crocuses and many other beautiful flowers. With so many colors to choose from, be sure to pick a good combination for a spectacular fall garden display.

One of the popular flowers for your fall garden is aster. The Aster flower resembles the daisy. They look like little starbursts, opening up into a beautiful bloom. Asters are the September birth month flower. They begin to grow at the end of summer, and continue to grow into fall. They are very easy to take care of, and they make for a gorgeous fall flowerbed.

Aster

Another is the crocus. They are a low growing flower that looks best when used as a border for other fall flowers. They are also ideal for the rock garden where their fall flowers are easily seen among the other low-growing plants. The really great thing about this flower is the colors they grow in. While many people think of beiges, browns, and earth tones as fall colors, this flower grows in wonderful purple and lilac colors. As a border for plants of neutral colors, the bright purples really make a fall garden pop.

Similar to Autumn crocus is Colchicum. Colchicum is one of falls brighter flowers. Also known as naked ladies, the Colchicum is a member of the Lily family. Colchicums are a small fall flower growing only about 6 inches tall. They bloom in colors like pink, purple, lilac and of course white, around the time when the Autumn crocuses are blooming. It is fitting since they resemble each other and make a perfect pair for your fall colorful garden!

Chrysanthemums, also known as mums are the typical fall staple flower. The Chrysanthemum is the November birth month flower. Some of the great colors mums come in include red, burgundy, rust, orange, yellow, purple, white and pink. Chrysanthemum blossoms comes in 12 different styles. Pick your favorite styles, along with your favorite colors to grow a great looking bed for the fall season.


Geranium flowers, also known as ‘Cranesbill’ is also a very popular flower for fall gardening. Geraniums are perennials and generally winter-hardy plants, grown for their attractive flowers and foliage. They come in a variety of colors and are very easy to grow. Geraniums can be obtained in flower in late spring and will add color to the garden until frost which makes it a perfect flower for your fall garden.

Salvia is the largest genus of plants in the mint family. Salvia derives from the Latin salvere meaning to feel well and healthy. Salvias are considered herbs, but they have beautiful flowers and produce a showy display with colors ranging from blue to red, with white and yellow.

Salvia

Marigold grows throughout the fall. They bloom in wonderfully rich colors of yellow, orange, and deep red. Some even bloom in two colors. One of the most beautiful two-toned color combinations seen in marigolds is a deep burgundy on the outer petals, with a dark orange color in the center petals. Marigolds are sturdy flowers with beautiful blooms that look great in mass plantings or in combinations with other fall-bloomers.

Sternbergias are winter growing species and dormant in the summer. The flowers are a nice gold/yellow fall color. Besides being pretty to look at, it is a very tough flower. Where most flowers will wilt and die in certain temperatures, the plant is tough enough to continue growing in most temperature ranges. Sternbergia’s ornamental evergreen foliage has a deep green, strap-like leaves which hold their color right through the winter adding a startling element of green to a fall colorful garden.

Crocus

Sedum spectabile bears pink flowers in through late fall. It has thick erect stems bearing shallowly scalloped, broadly elliptic, grey-green or bluish green leaves and beautiful star-shaped pink flowers. This award-winning plant looks great planted in bold drifts towards the front of a well-drained border and is a scene stealer in rock gardens.

Christmas cactus (Schlumbergera) is a perennial that blooms every fall in colors such as pink, red, or white. The flowers only last for a short time, but the plant itself sets so many buds that it can continue to bloom again and again.

The Tuberose is a perennial night-blooming plant related to the agaves. It grows in elongated spikes up to 18 in long that produce clusters of fragrant waxy white flowers that bloom from the bottom towards the top of the spike. It has long, bright green leaves clustered at the base of the plant and smaller, clasping leaves along the stem. While they are not the most beautiful of the fall flowers, they have a most wonderful fragrance. In fact, their scent is used in many different perfumes.

Polianthes Tuberosa

There are many more beautiful flowers that you can plant for your fall garden. Fall is actually a better time of year than even spring to plant or transplant perennial plants. The soil tends to be warmer which promotes root growth. With the cooler weather, you can spend more time in your fall colorful garden. Plus fall gardening takes advantage of cooler temperatures and fewer pesky bugs. So give it a little effort and you can plant a beautiful garden that you can be proud of in fall. Keep in mind that a properly planted and tended fall colorful garden can last long into even the coldest months.
Chrysanthemums In The Fall Garden

0

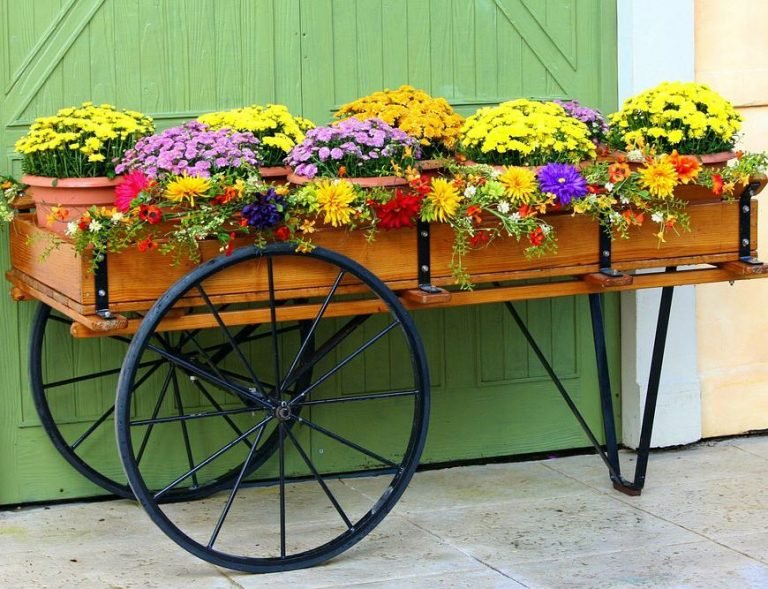
Chrysanthemums In The Fall Garden – Chrysanthemums show a wonderful diversity of colour which blends beautifully with the bronze and golden colors of fall. There are showy chrysanthemums for the garden, providing a wide range of marvellous colors. Ehey excel in the second half of summer and in early fall. That is when they really give the garden a lift.

You can grow chrysanthemums for exhibitions with enormous blooms, but that requires all kinds of specialist techniques. For most gardeners, chrysanthemums are far better outin the garden than on greenhouse benches, where they provide fulsome sprays of mauve, red, white, yellow and orange, in flowers that range from large balls, to open stars like large daisies, to spidery shapes with thin dangly petals.

The pom-pom chrysanths are hardy and are the latest of the varieties to come into flower. The single varieties are prolific flowerers and drop abundant seed so that in the spring time, many seedlings can be collected and replanted where they are needed to flower.

The early flowering chrysanthemums flower for about six weeks starting at the beginning of October. Many of these plants will not survive a harsh winter so a few should be kept protected, in a cold frame of similar, as stock. In the spring their roots can be divided to provide as many plants as needed.

The chrysanthemum is a fairly easy flower to cultivate as it grows happily in many different types of soil, always provided the soil is well-drained. Too much water in the ground during the winter months will cause the roots to rot.

Spring is the time to lift and divide large clumps of chrysanths if required. Just as the first new shoots are beginning to show is the optimal time to do this. This periodic thinning of large clumps of chrysanths will encourage more vigorous plants and larger flowers.

Chrysanthemums should be planted about 18 inches to 2 feet apart (depending on the variety) and as they start to grow, the tips should be pinched out to encourage side shoots with a resulting bushy growth. This pinching out can be continued right through until mid-June. With many varieties, this pinching out will eliminate the need for staking to support the plants.

To encourage vigorous plants, adding a well-rotted manure or mulch in summer will help conserve moisture in the soil, and any rain which falls will wash the fertilizing element of the mulch down to the plant roots.

Every garden should have one. Patio gardens, cottage gardens, architectural displays, and even modern gardens with all kind of geometric shapes benefit from the late-season boost of color and warmth that chrysanthemums provide.

Growing Garlic In The Kitchen Garden (Container)

0

Growing Garlic In The Kitchen Garden (Container) – Garlic is not difficult to grow in a kitchen herb garden. In this article we describe some of the many uses of garlic and provide some easy-step lessons on how you can start growing it in your herb garden or in pots or containers on your patio or balcony. Garlic is definitely famous as a herb with healing properties. Reports of these go back to Egyptian times. Even today with the vast numbers of over the counter cold remedies and prescription medicines lots of garlic enthusiasts start taking it in one form or another during the winter weather to reduce the chances of catching colds and flu. It’ also still commonly used to clean out the stomach.

However, garlic is best known today for its ability to enhance the taste of food. It makes a superb addition to many recipes, enhancing and bringing out the flavor of other ingredients. If you have used it in recipes you probably bought it from a local shop or convenience store, but if you really want to enjoy the true taste of garlic you need to make sure it’s really fresh, and the best way to do that is to grow it yourself.

Growing your own garlic

Garlic, like many other herbs is not difficult to grow. For very little cost and effort, but with the help of a few ‘secrets’ on how to do it you can very soon be enjoying your own garlic fresh from the garden, your back-yard or even your balcony.

You can start in a fairly modest way without any prior knowledge of gardening. All you need are some garlic cloves, a place to plant them and a little determination. Starting in October or November you can have your first harvest the following June, and then a major crop in August or September. This main crop can either be used immediately or stored for use over the following six months. Follow the simple steps below to find out how to do it.

Growing garlic in the kitchen garden (container)

You don’t have to have a garden to grow herbs like garlic. They can be grown very successfully in containers. In fact a container which can be positioned outside, close to your kitchen door, is an excellent way of providing you with a fresh and readily available supply of garlic from June through to late September. Once you have had the opportunity to use flavorsome fresh garlic in your recipes (or to help cure your cold!) you’ll not want to look back.

Buying your garlic cloves

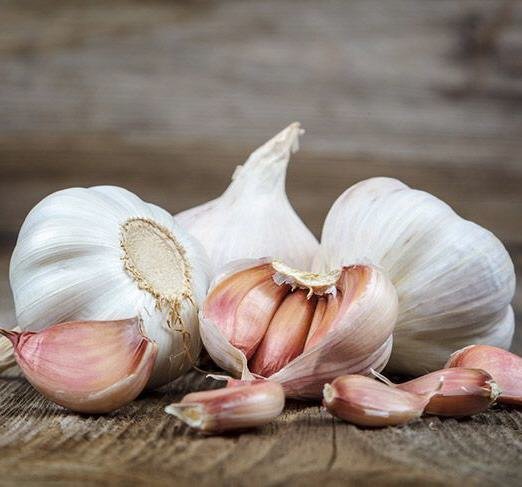
Garlic is grown by planting the individual cloves of a garlic bulb. Each clove when fully grown will become another garlic bulb. You will need about half a dozen or so bulbs to provide you with enough cloves to plant.

Although garlic bulbs can be purchased from your local food store, it’s better to buy them from a specialist supplier. The reason for this is that shop bulbs are very often treated to prevent them from sprouting. Needless to say, this is not you want! Also, a specialist garlic bulb supplier will offer you a choice of different varieties of garlic, varying from mild to strong. We recommend starting with a mild variety, and then experimenting with stronger varieties after you’ve grown your first crop.

Planting garlic in the container

Find or purchase a plant container that is 8 to 10 inches in diameter and at least the same size in height. A container of this size will enable you to plant around a dozen cloves, which, all being well, will produce the same number of garlic bulbs.

Fill your container with a good quality “seed and potting” compost. Break the bulbs into cloves as described above, and plant them 1 ½ inches deep and about 3 to 4 inches apart. Make sure you plant the cloves the right way up – the bottom of the clove has a slightly concave end.

When to plant?

The ideal time to plant is October/November. You can plant later, but by planting the cloves at this time of the year they will be able to develop some roots before the cold weather sets in. Keep your newly planted containers in a cool place (around 10 degrees centigrade) for about a month. This will make sure that the clove produces a bulb. And don’t forget to keep your cloves well watered.

Harvesting your garlic

Your garlic should be ready for harvesting any time between August to September the following year depending upon the weather and the variety of garlic you have chosen to grow. You should be provided with information about planting and harvesting the bulbs when you buy them from your specialist supplier.

It’s sometimes difficult to work out when your garlic is ripe enough to dig up. The leaves may look strong and healthy, but if you dig them up too early your bulbs will be too small. However, if you harvest too late your bulbs will have started to lose their quality. The best thing to do is to pull up a single bulb in late June and see how many sheaths (the thin papery layers that surround the bulb) you can peel off the bulb, if the answer is three then the bulb is ready to be lifted. If you can remove four or more layers then it is best to wait another couple of weeks or at least until most of the leaves have turned brown.

Storing your garlic

After you have pulled up your complete crop of garlic, lay the bulbs with their leaves attached on paper or sacking in a dry area. When they have dried out completely, remove the leaves and store them in a dry place. If you feel inclined you can try and plait your bulbs together with their leaves to produce a “garlic string”. Once prepared as described here, they will keep well for an average of six months, although some varieties will keep longer.

Cook and notice the difference

Garlic can be used in lots of different recipes and always tastes best when it’s fresh. The distinctive flavor of garlic is released in varying intensities depending on how it is prepared and used in recipes. The more the cloves are chopped or crushed, the more their juices and essential oils are released. For the mildest flavor, use garlic in whole cloves or large slices. For medium to full flavor, chop or mince the garlic to produce small pieces. For a full-on garlic intensity, smash, puree or press the cloves with a garlic press to release its juices and oils.

DIY All-Natural Methods For Controlling Bugs & Pests In Your Yard

0

Controlling bugs and pests in your home starts with doing the same thing for your yard. You want to make sure you don’t have a landscape that is inviting to pests. That can be a little difficult when you have a beautiful garden with flowers and especially if you’re growing fruits and vegetables. It is also difficult when you consider the sheer number of pests that you are up against in this battle. That being said, here are some solid tips for pest control in your yard this summer.

Access Points Cleanliness

Pest control experts, first tell homeowners to address entry points, and that’s certainly important when it comes to larger pests. Does your yard have a fence? Is your shed secure? These measures can help keep larger pests out of your yard, but the bugs are a different story. That being said, simply maintaining your yard properly goes a long way.

Maintaining your yard according to certain standards is the next step. You certainly don’t want any overgrowth. This causes bugs and other pests to feel like they are free to start nesting. It’s not just about the grass, however, as you need to keep those bushes and trees trimmed, too.

Additionally, you don’t want any brush lying around in your yard. Those weeds attract pests as well, so you do need to take measures to get rid of weeds. You don’t want weeds growing in your yard anyway, right?

Garbage Control

What about the garbage? Do you keep the garbage far enough away from your home? Ideally, you want it kept outside whatever fence you have in place. At the same time, you want to be sure the garbage is covered. No matter where it is kept, you don’t want it attracting pests. Throw some meat out there too soon and leave the garbage lid open, and you’re ringing the dinner bell for the pests.

Do you have patio furniture? What about an outdoor swing? If you have any furniture or fixtures out on your lawn, you want to be sure that they aren’t attracting spiders and other pests. What you’re going to do is look for egg sacks, and you want to be on the lookout for spider webs, too.

Do you use firewood during the winter? If so, you need to be sure it is stored properly. Firewood up against a home can attract termites and other pests. This not only will bring those pests to your yard, but it will put them right up next to your home, ready to move in without notice. Keep that firewood away from your home if you have it stacked up outside on your lawn.

Those Mosquitoes Though

Have you ever noticed that mosquitoes seem to show up when it rains? The water attracts the mosquitoes, and standing water is going to keep them around. Therefore, what you want to do is eliminate standing water, especially if it is up near your home. Standing water near a home can also cause foundational issues.

You don’t want the water on your lawn acting as a bat signal for mosquitoes. They will come calling, and these days, you especially don’t want them around with the mosquitoes carrying certain diseases like the Zika virus. Speaking of standing water, what about that mulch that is so beneficial when it comes to water retention?

Mulch beautifies your yard, but it can also be a problem when it comes to the pests. An alternative solution is to use rock or stone, but this cautionary tip doesn’t need to find you avoiding mulch. Just be careful not to let too much water build up, and check for problems from time to time. Additionally, you may not want to use the mulch in areas that are right up against your home.

Watch Your Patio

Your lawn may be clear, but do you have a patio? Sheds were already mentioned, and you need to keep them clean and tidy, too. If you have a patio or a deck, you may think everything is clean, but you have to remember you spend a lot of time out there. Maybe you enjoy those backyard barbecues. You have to keep everything not just clear but clean.

There are all kinds of flying insects besides the mosquitoes that were mentioned. Those bugs are attracted to light at night, but there are certain types of lights that can be used to help keep those bugs away. You want to use halogen lights that utilize a high-pressure sodium vapor. And if you set up extra outdoor lights, set them up several feet away from your home. What pests do show up don’t need to arrive on the airstrip with a red carpet laid out leading to the inside of your house.

Homemade Pest Spray

Do you use insecticides? Many people don’t like them but end up using them anyway. Would you like to use an all-natural solution to keep the bugs away in conjunction with the tips mentioned above? You can make a homemade insecticide instead.

You can mix vegetable oil with a mild soap in order to make what’s considered to be a natural insecticide. While that is certainly an option, you have already picked up on the fact that the soap doesn’t just contain all-natural ingredients. That being said, if you want to take this idea a step further, what you can use is neem oil.

The neem oil comes from the tree with the same name. It can be sprayed on the vegetation in your yard to keep those pests from feeding on everything. Neem oil is perhaps one of the best solutions for keeping pests away if you want to opt out of using insecticides.

What’s more is taking all these natural steps for a pest free lawn is going to make those bugs look elsewhere. They won’t be in your yard, much less in your home. You are going to notice a big difference as the steps you take start compounding like interest at the bank. Keep your lawn and home pest free throughout the year, and do it naturally.


Designing A Flower Garden

0

Designing A Flower Garden – A flower garden will bring you endless enjoyment. Not only is it a feast for the eyes, but it can fill your yard with fragrance and butterflies. Your friends will admire you, and you will love to relax at home while you relish your creation.

But if you create your garden haphazardly, you’ll be very disappointed. For example, if you plant the lush, tall flowers on the edges of a flower bed, they will hide the shorter ones within. If you plant a bulb in a shaded area when it needs lots of sun, it will most likely die.

So, a successful flower garden requires planning, but don’t worry, that’s part of the fun. The planning stage gives you the opportunity to bring out your inner artist and problem solver.

Designing a flower garden

The basic design elements for a flower garden

Your design doesn’t have to be intricate. A basic layout is all you need to determine what you will plant in each flower bed. In doing so, you will make decisions about the color and height of each flower, so that you choose not just the color palette of your garden, but the vertical and horizontal dimensions as well.

First, look at each area of your yard to determine the amount of sun and wind it tends to receive. In the areas of most sun, you will choose flowers that love the sun, leaving flowers that prefer shade to the other areas of the yard.

The type of soil you have is another consideration. You will probably need to get it tested in order to know what plants will work for you or whether you need to add other elements to the soil in order to grow your preferred flowers.

You can start by making a simple drawing of your yard and where you would like to plant your flowers. Again, note the amount of sun and wind each area receives, and the size of each area. Next, you might make a list of your favorite colors and favorite flowers. If you know little about flowers, do some research in seed catalogs or online. When you find a flower that you like, search for the answers to the questions below to determine if this particular flower will work in your garden. If not, move on! You will find another that you like just as well, if not better.

Choosing your plants

Before you begin buying plants, you need to determine how much you can spend on your garden. Work out a budget so that you don’t over-spend. Then, consider the following questions for each flower:

1. How much does it cost, and will it fit into your budget?

2. Does it grow in your zone?

3. What kind of soil does it need?

4. How much sun does it require?

5. Can it withstand wind?

6. Is it hardy, or does it require special care? If so, do you have the time to provide this special care?

7. How tall does it grow, and will you be able to accommodate its height?

8. How long does it take to achieve a flowering plant?

9. Is it an annual or a perennial, and when does it flower?

Take a look at photos of flower gardens to get ideas, and think about how many flowers you want. You may decide to frame a particular flower with greenery or separate two types of flowers with a non-flowering plant. This is what florists do when they arrange flowers in a vase or basket. They surround the blossoms with greenery almost like the matting of a picture on the wall.

Don’t forget flowering trees and shrubs. These add special interest in your yard, as they give you different vertical heights and horizontal widths. Bear in mind that they tend to take longer to achieve the flowering stage, but it may well be worth the wait. A flower garden is not created in one year’s time. This is a long process that you will always be tending, so you need to enjoy the process as much as the result.

Lawn Care In September

0

Lawn Care In September – The fall programme begins this September with the increasing interval between mowings and the raising of the height of cut to the fall level, which is a quarter of an inch above the summer cutting height.

Worms may become active – there are no longer any chemical worm killers so brush away the casts and increase soil acidity next year by applying Lawn Sand in spring. Use an fall lawn fertilizer now if the lawn is pale and thin.

Lawn care in September

Carry out lawn repairs during showery weather at the middle or end of the month. Bumps, hollows, broken edges and bare patches can be rectified by special instructions. Bumps are regularly scalped by the mower and therefore tend to become bare. Do not attempt to roll out bumps – this will generally make the area more unsightly than ever. Small hollows can be gradually filled in by working sifted soil (no more than half inch thickness at a time) into the turf at regular intervals. Deep hollows call for surgery.

Worm cast

The September routine for all lawns is to scarify first, then spike any compacted areas and finally top dress if you can possibly spare the effort and time for this vital operation.

If disease patches have already appeared, use the systemic fungicide carbendazim. Tackle moles this month – September is truly a busy month on the established lawn!

It is also a busy time for the new lawn – September is the best period for sowing seed but turf laying should be delayed until next month.

Lysimachia

0

Lysimachia (Loosestrife) is a useful plant for a damp site in partial shade. The genus Lysimachia includes about 150 species of herbaceous and evergreen perennials and shrubs, mainly growing in damp grassland and woodland or near water in subtropical regions.The erect stems bear white or yellow flowers, depending on which of the two species you grow, and you would never guess that they were related. Dig plenty of compost into the soil before planting and remember that these plants can spread rapidly.

Loosestrife

To prevent them from crowding other plants, dig up the clumps, divide and then replant every three years.  Creeping Jenny (L. nummularia) is an old favorite in rockeries. Creeping Jenny is a perennial plant with bright, small yellow flowers. Though the blooms won’t last long, they are pretty. For that reason, this low-growing “creeper” is best grown for its foliage, which makes an excellent ground cover.

Varieties of Loosestrife

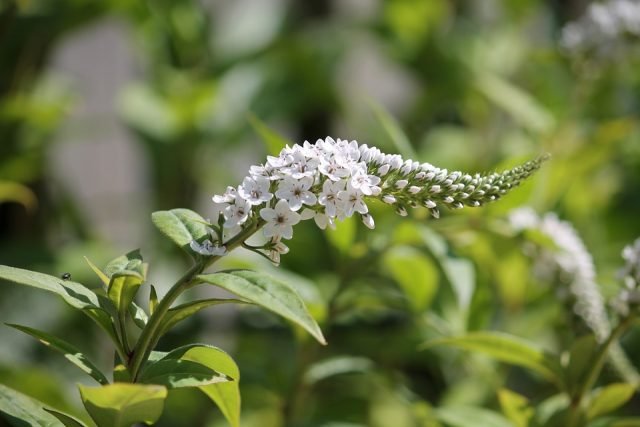
Lysimachia clethroides (Chinese Loosestrife) bears curved spikes about 5 in. long of tiny white flowers — the lance-shaped leaves and flower spikes give it the appearance of a small Buddleia bush. Basic details are height 3 ft, spacing 2 ft, flowering period July—September. L. punctata (Yellow Loosestrife) is rather smaller (2½ ft) and blooms earlier (June—August). Its leafy stems bear whorls of yellow, starry flowers which have a reddish tinge at the base of the petals.

Soil

Any moisture-retentive garden soil will do — thrives in sun or partial shade.

Propagation

Divide clumps in fall or spring. Lysimachia should be divided every 2 or 3 years.

Saponaria Plant

0

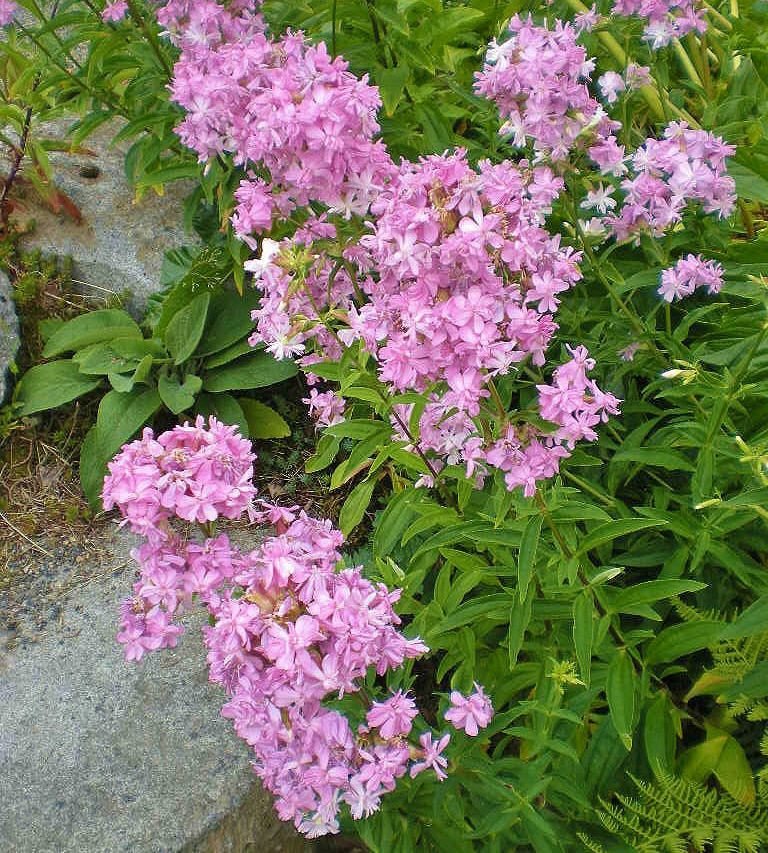
Saponaria Plant – The common names of Saponaria (Soapwort, Bouncing Bet) are a guide to some of its  properties. Stir a handful of cut leaves in a bowl of water and the lather produced reveals why it is called Soapwort. Leave a clump  to grow undisturbed in the border for a few years and the sight of  its stems springing up amongst other plants reveals why it is also called Bouncing Bet.

It is really too invasive for the choice border,  but it remains a charming cottage garden plant. The erect stems  bear lance-shaped leaves and in summer a terminal cluster of  flowers. It is completely trouble-free – merely out down the  stems to ground level in the fall. 

Saponia officinalis

Varieties of Saponaria

Thespecies grown in gardens is Saponaria officinalis (height2-3 FT,  spacing 2 ft, flowering period  JuIy – September). The pink single- flowered species is one of our native flowers, found wild in hedges and  woodland, as well as being a popular plant in cottage gardens, but it has now been largely superseded by the double-flowering varieties  –  ‘Rosea Plena’ (pink), ‘Rubra Plena’ (red) and ‘Alba Plena’ (white).

Saponaria officinalis

Site and soil

Any reasonable garden soil will do — thrives in sun or light shade. 

Propagation

 Divide clumps in fall or spring.    

Saponaria ocimoides

5 Things You Should Know About Professional Jigsaws

0

A jigsaw(sabre saw) is a necessity for woodwork workshop as its functionalities are crucial for efficient cutting operations and quality finishing. Professional jigsaws are power tools that are primarily used to make straight cuts, curved cuts, plunge cuts and bevel cuts among other delicate cuts. There are different types of professional cuts available in the market. Some of the basics facts you should acquaint yourself with about professional jigsaws as enumerated below include:

Jigsaws differ in efficiency and performance

Just like any other power tool, the efficiency and performance of jigsaws vary depending on their specifications. Important factors that determine the performance of a jigsaw include raw power, stroke per minute and cutting action. Considering these critical features will definitely get you somewhere close to having the best professional jigsaw from a market crowded with a dizzying number of brands. Most professional works will require highly precise, versatile and powerful jigsaw to match the demanding nature of work. However, there is no standard measure and all these will depend on the specific task that you wish to perform.

Price variation is eminent and tied to tool specification

Some of the best professional jigsaws retail at prices ranging between $50 and slightly above $150. With a budget as low as $50 you will be able to possess a professional jigsaw, however, affordability comes with the underside of limited functionality and performance. Mid-price jigsaw will sacrifice some vital features required when doing woodwork jobs. Before deciding on the type of jigsaw to purchase, you need to assess the nature of the work you undertake and determine the possibility of up-scaling as well.

Professional jigsaws have two types of connectivity

Connectivity of a jigsaw to the power source is crucial to mobility and portability of the power tool. There are primarily two types of jigsaws; corded and cordless jigsaw. Each has its pros and cons and there is never a universally ideal jigsaw as per this categorization. While corded jigsaws are very powerful to perform very demanding tasks, they greatly restrict movement, unlike the cordless jigsaws which are portable and easy to move around.

Proper usage and maintenance are critical for seamless operation

Using a professional jigsaw require some basic knowledge about the tool and probably a few step training on how to use them. Many jigsaws come with a user manual which helps users understand how to operate the tool and in the mechanism behind which it works. The user manuals are not always similar and it is advisable that you should read the manual before operating the tool even having had experience with other jigsaws because there may be slight variations.
Regular maintenance will keep the jigsaw at a top-notch performance. A vital maintenance practice involves changing the blades whenever necessary.

There is no standard professional jigsaw suited for all woodwork needs

Finally, in spite of professional jigsaws exhibiting a wide range of versatility, there is no single jigsaw that will perform optimally at all sorts of works. Every jigsaw has its strengths and shortcomings, therefore, a change of jigsaw and dynamics is sometimes inevitable depending on the operation one is performing

5 Tips to Caring For Your Garden

0

There really are no shortcuts when it comes to gardening. If you want a healthy garden, then you will have to do plenty of regular maintenance all through the growing seasons. Plants need enough water, sun, and nutrients in order to be productive. However, garden care doesn’t have to take up too much of your time. As long as you dedicate yourself to doing some general garden chores every week, then you should have a flourishing garden in no time.

That said, what is the best starting point for good garden care? As simple as it sounds, you simply have to pay enough attention to it. Stroll through your garden every so often and look around. That way, you will be able to notice if your plants are parched or if your flowers are getting overrun with pests. The key here is to discover problems early enough to do something about them. Otherwise, small issues can quickly get out of control and turn into major catastrophes that take lots of time to resolve. With that in mind, here are 5 tips to help you take care of your garden effectively:

  1. Examine Plants before Buying

The easiest way to stop diseases from spreading in your garden is to avoid bringing them there in the first place. However, it’s quite hard to learn what a healthy plant should look like – especially for rookie gardeners. So start off by increasing your knowledge base. Consult the relevant gardening books and magazines to see what healthy plant specimens look like. With that understanding, it will then be easier to identify sickly or insect-ridden plants.

A general rule of thumb is to avoid plants that have rotted stems, dead spots, and insects. Also, check the root quality before making any purchases. You want to ensure that the roots are firm, while, and spaced out well all over the root ball. Avoid roots that are dark and mushy.

  1. Manage Waste Right

Nothing provides a better breeding ground for plant diseases and pests than unattended garden waste. The best way to go is to clean out your garden during the fall, even if you’re living in a moderate climate. Diseases usually breed on dead leaves and debris in the winter months, only to attack the new leaves as they bud during the spring.

However, proper waste management in the fall can help you get rid of most of the common diseases that decimate gardens. You can clean up and have a licensed rubbish removal service to get rid of the waste – especially inorganic – completely. Composting organic garden waste is a great option for the more eco-conscious.

  1. Look Out for Bugs

Insect damage to plants isn’t just cosmetic. It makes your garden more susceptible to bacteria and viruses that can cause irreparable damage. For example, aphids are carriers of organisms that spread a disease known as impatiens necrotic spot virus. Leafhoppers carry the disease Aster yellow. Constant insect attacks will put your plants under stress, making them more susceptible to diseases.

  1. Water Correctly

Watering your garden regularly is a great thing. However, doing it correctly is even more important That’s because most diseases need that water as much as your garden does. Constant watering can allow these pathogens to move, grow, and reproduce.  Keep this from happening by using watering methods that reduce moisture on foliage. Drip irrigation and soaker hoses are just a few great options.

  1. Prune Properly

The best time to trim your trees and shrubs is in the late winter, not spring. That’s because wounded branches will get infected over the cold, wet winter months. This ensures that the disease becomes established while the plant is dormant. Doing your pruning later in winter will prevent any diseases from spreading to your new plant growth.

Using A Scented Trees And Shrubs For Your Landscape

0

Using A Scented Trees And Shrubs For Your Landscape – Trees and shrubs can have many different forms, for example many conifers are conical, pyramidal, or powerfully vertical. Some are prostrate and spreading. To some degree these are scented and everyone is familiar with the scent of pine, but it is only if you rub or brush against the tree, which can be a prickly experience! Weeping trees have a very attractive romantic form and scented varieties include weeping Cercidiphyllum (Katsura Tree) Pendulum, which is quite spectacular. It has thrilling color in the fall and is scented like caramel. Also the weeping Silver Lime is an attractive choice for scented gardening. A shrub that looks like a small tree is Buddleja Alternifolia, and it has lovely flowers with the scent of honey in early summer.

Blue Atlas Cedar

Trees can affect the character of a garden and all gardens, however small, should have at least one. They make such a strong outline against the background and the sky. A number of conifers have scented needles, such as juniper and cypresses. Some of them have slender columnar forms which are used in gardening to create a formal or contemporary feel. The more spreading, horizontal conifers like Cedar of Lebanon, (scented of blackcurrant in summer weather), Blue Atlas Cedar or Scots Pine, create a less formal look for a gardening design.

Buddleja Alternifolia

Primarily we tend to choose trees and shrubs as gardening subjects because they fit architecturally into a given space. Scent is often the last criterion we would use to select a large feature such as this. Trees and shrubs are such significant gardening features that eventual size and the shade cast may be of more importance than scent. Shade is desirable to some degree, but if trees and shrubs are so big and planted on the southern side of a garden they may cast everything into gloom! Scented blossoms may be considered a bonus in gardening terms once the other considerations have been met.

Buddleja Alternifolia

For low, formal hedging you really can’t beat the neatness of Box. It is not as fast growing as privet. If your idea of gardening is about clipped topiary, Box is ideal for designs such as Box Balls or Pyramids on the simpler level up to Elephant, Peacock and Teddy Bear shapes for the more experienced topiarist. Low box hedging can bring a formal look to your gardening, even if other areas are less so: it can bring the garden “into line” so to speak, by creating straight lines of dense green. Of course you can make a curved hedge from it too. One of its less attractive features is its smell, but that is a matter of personal taste. It smells too strongly of cat’s urine! If you really can’t handle the smell then consider using Lonicera Nitida instead. This shrubby honeysuckle has sweet, fruity cream-colored flowers.

Lonicera Nitida

Trees and shrubs can of course be used to make a windbreak screen. In order to create the still, sheltered microclimate in which other scented plants can thrive, this may be essential, depending on the situation of your plot. Trees and shrubs can make better windbreaks than walls, as they don’t offer the wind a “full stop” barrier which the wind can then leap over and cause problems due to eddying on the other side. If your region is reasonably mild for gardening, Eucalyptus can grow very fast to create an instant hedge or tree in a selected spot. They have beautifully minty-scented foliage, flowers with the scent of honey, and are fast growers. They can be hard pruned if you don’t mind a modicum of gardening, especially if you don’t want them to grow so big and if you want to keep the prettier, juvenile blue leaves coming back year on year.

Eucalyptus

A number of gardening writers seem to ignore trees and shrubs when they write about scented gardening; perhaps small and pretty annuals spring to mind or of course roses. In fact a huge amount of scent can be generated from gardening with trees and shrubs. Trees and shrubs can give such a variety of powerful scents that it is a shame that most of us don’t have the space to use more of them in our gardens. The architectural effect of trees and shrubs is undeniable.

Natural Gardening Ways For Growing Beans

0

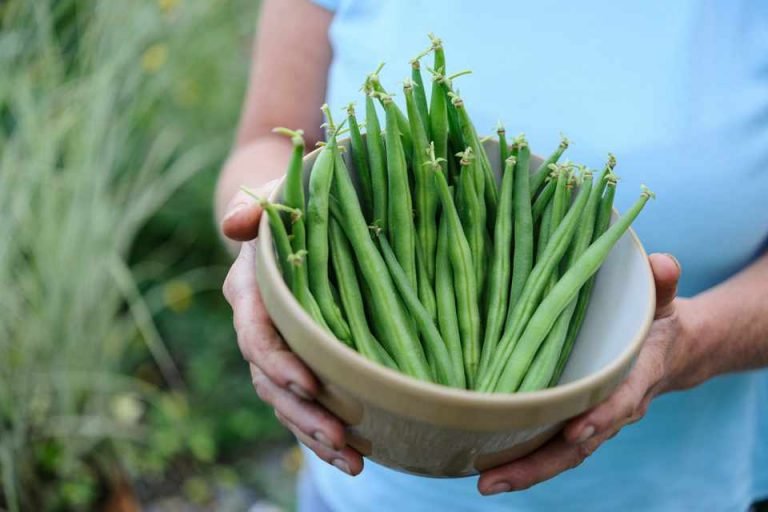
Natural Gardening Ways For Growing Beans – A favorite vegetable in Europe especially France where some varieties are specially grown for shelling and drying as haricots, most beans however are grown for their pods which are cooked and eaten whole. They are best picked and eaten when young. French beans also freeze well. There are three types of French beans, pencil-podded, usually flat-podded and wax-pods.

Most beans form bushy plants and these are the ones most suitable for growing in containers. Earth up the stems and water freely when the plants are in flower for best results. The black, yellow and purple varieties now available add interest to a patio garden.

Try this fast and simple gardening ways for growing beans in vast quantity – without erecting a clumsy conventional bean trellis out of canes. You can grow climbing legumes in a very small root space so why not exploit that?

You merely need an ultra-intensive trellis. First, erect a frame out of plastic pipe. It is often available in 10 ft strips, which is ideal. Take three uprights to prevent sagging at the midpoint and sink some 18in below ground, and cross them at the top.

Along the top rail, tie degradable cord every few inches. So at season’s end, the entire trellis can be cut down for the compost pile. Tie another cord at soil level, from one upright to the next. Then tie the hanging strings to it.

Another idea, common in European allotments is to set another crosspiece along the bottom – and double-loop the cord around it. And criss-cross the strings up and down the trellis. That’s easier than tying each cord off.

You then sow three rows of climbing peas or beans along the bottom strut. One seed goes on either side of every vertical string, 3in from the cord. Then sow another seed right below the bottom cord, centered between each vertical string.

Add more seeds to the front and back of the vertical pipes. Then you plant those seeds just two inches apart. That’s right, just two inches.

You’ll wind up with 30 foot of row equivalent in only ten feet of growing area. As the beans flourish, you’ll soon have a massive wall of nutritious legumes.

Growing beans intensively in a cool climate

It’s easy to do this in,say, the southern US where the light is strong and the summer days are extensive, sunny and warm. In fact, in tropical zones, climbing beans can be successfully planted a mere one inch from each other. So long as they get enough sun on their leaves, and ample food and water, beans will do well even if packed together neck to neck.

But if you live in more temperate climes, sow your plants a prudent distance of three inches apart and line the rows from North to South so they have the maximum sunlight.

Amazingly, a trellis with three rows of beans very close together does well even in a temperate climate if it’s very well watered. So thickly do the plants grow, annual weeds are almost entirely suppressed.

Indeed, you don’t need to weed between the walls, except in the early days, because they act as a mulch for each other. Weeds don’t harm a well-started legume.

To have your plants suppress weeds is one of the best natural gardening ideas! It’s a key tenet of bio-intensive gardening. But if you’re growing some rare variety be sure to build your trellises themselves at least three foot apart. And dedicate each trellis to a single variety.

It’s enough distance so that your climbing beans (Phaseolus vulgaris), the ‘common’ bean, will not readily cross-pollinate. So the seed from each rare heirloom bean variety stays pure.

Don’t sow more than one variety of runner bean (Phaseolus coccineus) in your plot, however, if you need to save the seed and maintain the purity of the strain. Or if your neighbor is raising a separate strain. Runner beans need to be isolated by at least a mile.

Sow late spring to midsummer. The seeds will not germinate until the soil temperature reaches 12°C (53°F).

Planting depth: 4-5 cm (1½-2 in).

Planting distance: Sow two seeds every 9 cm (3½ in). Remove one if both germinate and remove every other plant when the plants are established.

Site: Sunny, preferably sheltered from strong winds.

Harvest: Late summer, early fall. Time between sowing and picking approximately 8—12 weeks.

Uses: Excellent summer vegetable.