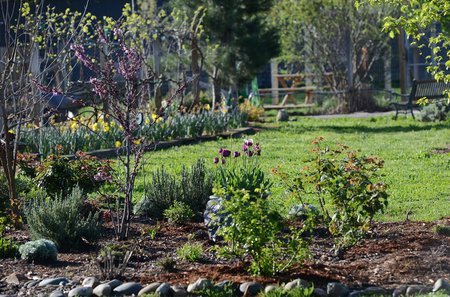
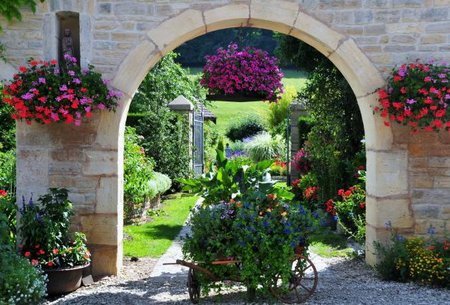
Decorative Stones For Landscaping – Having a sprawling garden in front of the house is a dream that each one of us has. Beautifying the garden with flowers, hedges, decorative elements, etc. that match with your choice can customize the look of your garden and make it appealing to the eyes. You can add several decorative elements to your landscape where you can install picket fences, water fountain, hedges, flowering plants, etc. and beautify it accordingly.
A decorative element for gardens that several landscapers make use of is decorative stones. Stones vary in size and shape and can be made to use in several ways depending on the kind of garden you have and the amenities it can accommodate.
Apart from decorative stones, several landscapers suggest the use of large or mid-sized rocks that can make a great piece of garden decoration. Decorating your garden is a task that you would love to do it yourself but if you are in need of a guide to the kind of pebbles and stones you can use for your garden, here is some necessary help.
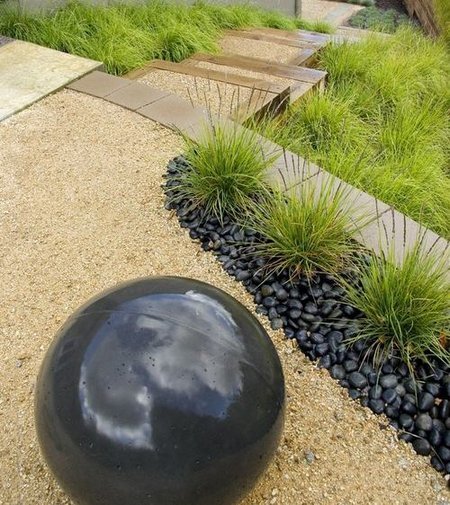
Mexican pebbles
1. River pebbles – They are round and have a smooth finish to them as they are extracted directly from the river beds that have a natural and smooth texture. These pebbles aren’t that large and are often grey and light brown in color. You could use these pebbles near the flower beds to prevent the growth of weed and to balance the moisture level of the soil.
2. Gravel – These are pea-sized that are round and smooth. You could use them in flowering pots along with soil. It doesn’t block water drainage and allows the soil to retain its moisture level in the pot. If you plan to set up large stepping stones on a pathway, you could place the gravel under them to let it get a grip and not move from its place. They are white or grey in color and add a color to your garden apart from the color of the grass and the flowers.
3. Boulders – These are large and differently shaped rocks which cannot be used on around flower beds or the lawn due to its large size. Even though it is large, it has a decorative element in it and thus, can be used to line the area if you have placed a water fountain in your garden. It highlights special attractions in your garden and thus bringing about an aesthetical feeling.
Elements Of Informal Garden – Informal gardens do not have the straight walks and avenues that create obvious places for focal points. Their curves and hidden spaces should reveal eye-catching surprises at the last minute. As you round a corner, you should be confronted by something to please, astonish or amuse.
Sculptures should have a sense of movement; this is why animal sculptures often work well. How you place these eye-catchers is all-important because, as they will probably be approached from many different directions, they must look good from all angles. Sculptures will enhance wherever they are situated: they can be hidden behind foliage, hung from the branch of a tree or placed beside a pool or pond.
A feeling of movement
You can control the way people move around your garden by the way you plan the spaces. Long, narrow paths will encourage people to walk fairly quickly. If you want people to linger and look, you must provide wide paths of firm, dry material and seats for them along the way. A path next to a summer border should be wide enough for two people to linger and admire together, whereas a path going to a compost heap can be narrow and hedged. Paths that are too long, narrow and enclosed will make people feel uncomfortable – the higher the sides, the narrower and longer a path will seem.
A feeling of balance
Balance in the formal garden is provided by symmetry. In an informal garden you have to create your own balance. A large, open space such as a lawn can be balanced by a strong upright tree or sculpture. A white seat, always a very prominent feature, can be balanced by a dark green background or by setting it in an arbor. A group of trees or shrubs can be balanced by an answering bulk of some kind, such as a table and chairs of a strong defined sculptural shape or a small building.
Water
Natural-looking ponds and pools are ideal water features in informal gardens. You will probably get a better shape by digging the hole and lining it with butyl rather than by buying a preformed liner. Planting should include water plants, as well as marginal and bog plants.
Other water features could include a small stream or a rocky cascade, which can quite easily he created with a collection of rocks, a small reservoir and a submersible pump. Cobble, millstone and wall fountains can all be useful when you want to provide the sight and sound of water without giving up space to a pond.
Garden In The Barrels – During the creation of your garden you may find that you require an especially big container – perhaps to grow shrubs, small trees, or simply a large planting. Garden centers now have a wide range on sale, including ceramic and terracotta tubs, fiberglass planters, and old beer barrels. There is also scope for improvisation. Bread crocks and various other vessels from the kitchen can be used as container for growing plants, if you drill holes in the base.
Fiberglass. As fiberglass can easily be molded to any shape, and colored in any shade, it is widely used to make simple plant tubs or replicas of wooden Versailles planters, elaborate lead vessels, and other antique containers that are hard to find and extremely expensive.
If done well, fiberglass imitations can look most convincing. They are moderately hard wearing, they are light to move around, and they require little maintenance.
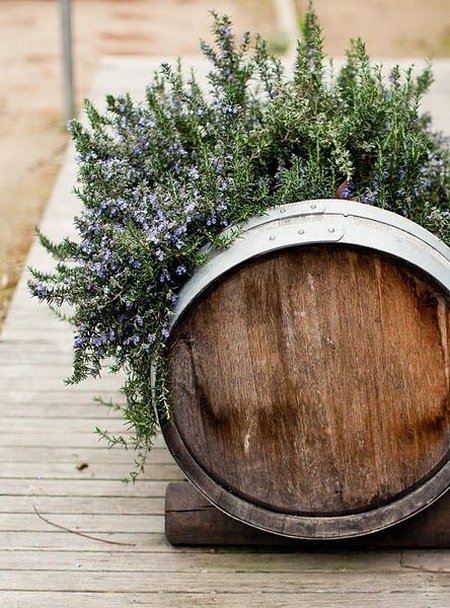
Beer barrels. Originally, the familiar wooden barrel with iron bands was used for maturing and storing beer. Cut in half, it makes an excellent container for plants, and will last outside for several years, until the metal bands rust away. It is important to keep the wood of this type of barrel moist; if allowed to dry out, the wood contracts, the metal bands fall off, and the barrel collapses. Usually, moisture from the soil is adequate to prevent this from happening.
It is always worth checking barrels bought from garden centers because if they have been stored empty for some time, the wood may have dried out. If this is the case, give the barrel a thorough soaking before you plant it up. If you get barrels from a brewery, you may have to drill some 1 cm drainage holes, in the base.
To help preserve the wood of barrels, you can prime and paint them. Choose a color that suits the barrel’s intended site. Whilst white, black, and green fit most situations, the more adventurous colors can work well if they pick up the paint on the exterior woodwork of the house, or enhance the plantings. Yellow sets off golden-leaved plants, and gray goes well with silver foliage.
Plant choice. Because of their size, tubs and barrels are especially useful for growing shrubs and small trees with large root runs. Spring bulbs, especially the taller growing narcissi and tulips, look effective too, their bare upright stems echoing the straight sides of a tub. A group of a single variety of ivy plants looks particularly well, covering and tumbling over a large barrel, and will maintain interest all through the year. In summer, a mass of petunias or low-growing roses look magnificent.
Water garden in the barrel. If the barrel or tub is watertight, you can fill it with water and grow some aquatic plants, perhaps miniature water lilies and some small floating species. Make sure that you support the water lily roots at exactly the correct depth below the water surface. If necessary, prop up the basket in which the roots are held with a couple of bricks. Keep the surface of the water clean, and top up with water whenever it is necessary.
Creating A Jungle In Your Backyard – Creating a hardy jungle. A jungle is lush with foliage, with many large, differently shaped leaves growing at different heights in curtains of green, all overlapping and intertwining. You can create this effect in the garden by using vigorous climbers in association with large-leaved hardy plants. Many plants grow very tall in the jungle, climbing up into the trees towards the light. You can simulate the height of a forest canopy by installing tall scaffolding screens. Make sure the scaffolding is robust and firmly fixed because many plants become very heavy when in leaf and need strong supports.
If the site is sunny, the golden hop (Hummlus lupulus ‘Aureus’) is a good candidate and perfectly hardy. Any vigorous climber with large leaves will add to the effect. The crimson glory vine (Vitis coignetiae) will eventually grow to 24 m (80ft) and Virginia creeper to 15 m (50 ft). The leaves or both plants turn bright red in fall. The evergreen Clematis armandii is another vigorous climber with plenty of large shiny leaves and will make your screen look like a snowstormin spring with its masses of white flowers.
Clematis armandii
For a shady site, Hydrangea petiolaris is a vigorous, hardy climber with handsome, flat, white lace-cap flower heads, which will reach 3.5 m (12 ft) on a wall or 5 m (16 ft) growing up a tree.
For lower plants use Fatsia japonica, with its enormous palm-shaped leaves, or phormiums and yuccas. Yucca glauca is a mass or straight, thin gray-blue leaves 1.5 m (5 ft) across. Plant it in drifts close together. Yucca ‘Vitorio Emmanuel II’ is one of the biggest and best. It will grow to 1.8 m (6 ft).
The golden hop
For a moist site choose Gunnera magellanica, Zantedeschia aethiopica and Rodgersia aesculifolia. Bamboos are easy to grow and can contribute to the exotic feel of a garden. Choose ones that will not spread, or grow them where you really want a jungle or keep them in pots. Phyllostachys aurea is well behaved and will grow to 4.5 m (15 ft).
Rodgersia aesculifolia
Creating a tender jungle. Many tropical-looking plants, often from Mediterranean areas, although difficult to propagate, are not difficult to grow. Some prefer an exposed site in the backyard; others grow best in dappled shade. The hardier eucalypts and the holm oak (Quercus ilex) are dense enough to keep the heat in and sparse enough to let light through, especially if you cut off their lower branches. Eucalyptus aggregata, E. perriniana and E. parvifolia all make good canopy trees.
Garden Path Edging – Edgings can he used to dress up a plain path, provide crisp lines between paving and landscaping materials, or hold paving slabs or bricks in place. In most cases, all you need to do is decide on the material you’d like to use, excavate shallow trenches on each side of the path, and stake or set the edging in place. However, integral concrete edging needs to be made at the same time as the path.
Edging options
Edging materials can vary just as much as the paving they border. Choose from concrete, brick, stone, tile or timber.
Edging styles, however, fall into just two broad categories: a mowing strip that is laid flush with the path so that you can run one wheel of a lawnmower along it, or a raised edging that puts a lip at each side of a path.
Mowing strips
Mowing strips should be 150-300 mm wide. Concrete, brick, tile and other smooth-surface masonry materials are best for mowing strips. You can use lengths of timber, but be warned that they are easily nicked by the mower blade and will rot away in time.
Raised edgings
A raised edging keeps aggressive groundcover plants from growing over a path, channels water run-off and makes a clean break between different surfaces. If you are planning a path of gravel, or similar loose material, a raised edging is the only way to go. Keep a raised edging low, say 10 mm or so above the surface, or make it at least 75 mm high – anything in between can easily be tripped over. Below and opposite we give instructions for installing several types of raised edging.
Brick edging
Bricks are probably the most popular path edging, whether set on edge, on end or at an angle for a sawtooth effect. They make excellent borders for concrete, loose materials and, of course, brick paving. Use engineering bricks to withstand the damp. Brick edging should be set in sand or mortared to a concrete base. Make sure the edging is firmly set in place, otherwise the bricks will soon work themselves loose.
Victorian-style edging
In Victorian times, paths were commonly edged with terracotta edging tiles. These were produced in a variety of patterns, one of the most common being ‘rope’ edging, the top edge of which was shaped in a spiral like a length of rope. Today, it is possible to buy reproduction Victorian edging tiles, but you can often find the real thing at architectural salvage yards. These edging tiles have a shaped lower portion, allowing them to be easily set in the ground.
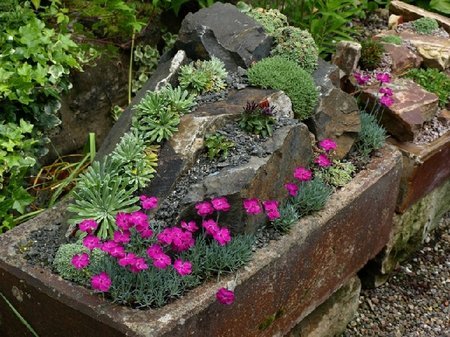
Stone sinks are difficult to find, and they are expensive to buy when you track one down, but the old porcelain models are more readily available at not such extortionate prices. It is then quite easy to convert one into a good replica of a stone sink, by cleaning it, coating it with a contact bonding adhesive, and then applying a roughened layer of cement, sand, and peat, mixed together with water. The mixture should only take a few hours to dry thoroughly.
Once filled with soil and rocks, the sink will be immensely heavy, so place it in its final home while it is still empty. Even empty, it will be very heavy.
If you intend to plant the sink with alpines, put it in a dry, sunny position and raise it on bricks or some pieces of stone, so the plug hole is well clear of the ground. As the roots of alpines dislike the wet, cover the bottom of the sink with a very thick layer of drainage crocks or pebbles, and fill it using a potting mixture which has a high gravel content. Coat the outside of the sink with live yoghurt and it should soon weather to resemble an old stone sink.
For making a sink garden you’ll need: a ceramic sink, a contact bonding adhesive, an application comb; cement, sand and peat (proportions 8:2:1); trowel, old paintbrush, crocks, potting mixture of medium nutritional value, with fine gravel (proportions 4:1); tufa or porous rock and large screwdriver.
Making process
1.Thoroughly clean the outside and inside of the sink garden so that it is free of dirt and grease. Apply an even layer of contact adhesive to the outside surface and the top 5cm (2in) of the inside surface.
2. When the glue is tacky, apply a 1cm thick layer of cement mixed with sand and peat. Smooth on firmly with a trowel and roughen with a paintbrush.
3. Place the sink garden in its final position, and raise it off the ground with bricks or stones so that it can drain freely. Cover the base with a thick layer of crocks for good drainage. Fill the sink with potting mixture and fine gravel.
4. Arrange tufa over about a quarter of the surface area of the soil, leaving sufficient room for all the plants. Using an old screwdriver, chisel out holes in the rocks for stonecrops and houseleeks.
Colors In Your Garden – The handling of flower and foliage color in the garden usually causes gardeners the most difficulty, but it also entails the most fun. We all agree that some colors ‘go’ better together than others – though we may disagree which – and that in ‘going together’ these colors enhance each other. Good combinations are what we strive for, and that can involve both harmonies and contrasts.
When deciding how to plan a color scheme, it can be helpful to refer to the chart called the ‘color wheel’, which is based on the spectrum. On this circular diagram, the primary colors (red, blue and yellow) are separated from each other by related secondary colors (violet, green and orange).
Whereas adjoining colors, say orange and butter yellow, are generally perceived to harmonize, those opposite each other, say yellow and violet, are ‘complementary’, that is to say, they provide the greatest contrast.
The color wheel is simply a useful illustration of what many people instinctively perceive. If, for example, you were to plant the deep purple-blue Salvia superba ‘May Night’ next to the yellow Alchemilla ‘Moonshine’, you would find that they made a lively and satisfying contrast, which drew your eye irresistibly. It would, therefore, come as no surprise, and is certainly no coincidence, that the two colors are to be found directly opposite each other on the color wheel and are therefore complementary.
Salvia superba ‘May Night’ and Alchemilla ‘Moonshine’
Flowers and foliage come in an almost infinite number of color variations, and often the colors change as the season progresses and the plant matures. Flower color, or our perception of it, is also affected by external circumstance: by the type and intensity of light (bright colors look paler in the twilight while pale ones acquire luminosity), by the background, and by the color of neighboring plants.
Brightness, or ‘intensity’ is another factor. The hardest colors to place in the garden are the bright ones, especially white, red, yellow and some blues. Bright colors tend to excite the eye and can dominate a scheme out of all proportion to their actual size, so should be used with forbearance. In sunny climates, with greater clarity of light, the use of bright colors is easily justified, while pale colors tend towards insignificance; under cloudy skies bright colors can look brash, even harsh, while the subtler paler colors not only show up to advantage but are easier to manage because of the wider range of colors with which they will harmonize.
We all know what we mean by a color clash, though again we may not agree about what constitutes one. There are no immutable rules, but to avoid causing your guests to recoil in horror when you take them round the garden, take the simple expedient of keeping yellow-based reds away from blue-based ones – or use a green, gray or white ‘foil’ of foliage or flower between them.
Pastel shades rarely clash but, used exclusively, can make for some pretty dull schemes: varying the intensity of color within the scheme is therefore important. You can make a color scheme more interesting by using flowers and foliage in one of the bright primary colors, toned down by neighboring plants of the same color mixed with white to give pastel colors, or black to give the browns, dark blues and purples.
Once you have decided in what proportions you want hot or cool colors in your garden, the choice of color scheme depends first and foremost on personal preference, but it is also important to consider the surroundings. This can be as simple as enlivening a white wall by planting parthenocissus, with its bright scarlet fall foliage, or as complex as softening all the ‘hard landscape’ of the garden with a variety of mixed plantings.
Parthenocissus
A single color scheme can work well in a very small garden, but it is worth considering changing the predominant colors in mid-season. When the pinks and blues of early summer have faded, the emphasis could shift to the many bronzes, reds and yellows of high summer and fall – perhaps with the blues and mauves of asters and tradescantias to act as contrasts to such a brightly colored scheme.
Everyone has favorite colors, and the most successful gardens reveal the personality of their owners. That being the case, do not be side-tracked by any preoccupation with ‘taste’. The widespread rejection of orange flowers, for example, seems to me inexplicable; deep orange contrasted with blue-purple can be dramatic and satisfying. Think how rich a picture you could paint with the purple Clematis jackmanii ’Superba’ flowering alongside the orange-yellow of Eccremocarpus scaber. Even it a generous selection of colors does not please the purists, that does not mean that it cannot work for you. It is only important to pay due attention to context and proportion; problems arise chiefly it too many warring colors are introduced willy-nilly, without any concern for balance.
How To Help Wild Birds During The Winter? wild birds could survive fairly well in the winter. The combination of climate change and declining bird habitat has made it tougher for birds to survive. There are some pretty simple things that you can do to ensure that the birds in your area can be healthy through the winter. It is great if you can do all of the things on the list, but as with all things, starting small is just fine.
1. If possible, place a variety of bird feeders out so that you can feed multiple types of birds. Purchasing higher quality feeders will be more economical in the long run.
2. Keep your feeders full of high quality bird feed. In the summer when there is a lot of food available, the quality of the bird feed is not as much of an issue as it is in the winter. If you can afford to purchase a higher quality bird feed, it will help the birds’ maintain an improved nutritional status in the cold months.
3. Provide water by installing a heated bird bath. Birds need to access water all year long. Place the heated bird bath near some feeders so that the birds will find it more readily. Years ago, my friend and I discussed the need to do this and decided not to mess with Mother Nature. Unfortunately, Mother Nature has been changing so quickly that many wild birds can no longer keep up. Thawed water is needed these days to keep birds healthy. Birds are far less likely to find your bird bath if food is not available close by.
4. Leave the plants in your garden rather than cutting them back. Gardeners call this winter interest, but birds can find seed to eat and possibly places nest for the winter.
5. Put out some bird houses to allow birds protection from bitter weather. Before your purchase bird houses do some research to find out what type of house you need to shelter birds that winter in your geographic region. In addition, make certain the house is functional and can be readily cleaned out annually.
6. Plant shrubs that birds can roost in.
7. Plant shrubs and trees with berries or fruit. Birds will access the remaining fruit or berries throughout the winter.
Planning For Early Spring Garden – As you plan what to add to your garden this winter, we’re sure you are paying attention to the light and water requirements all good perennial vendors attach to each entry in their catalog. This is very important to your success with each plant. But it is possible to mix more drought loving plants with those that require more moisture in the same planting with good results. The secret lies in the substructure of each given plant’s area in the bed.
Drought lovers do like some water, they will reward you with a much more beauty with some weekly water…in a drought bed. But what if you want to put say – lavender and phlox in with lobelia and ligularia? Those water requirements can really hamper one’s creativity!
So some knowledge of drainage engineering will give you the ability to try mixing them in the same planting area. Lavender and Phlox like drier conditions. Not that the Phlox will die in a spot where daily overhead watering is received. It will survive and grow huge, and flower excessively, but be stricken with fungus that makes the lower leaves yellow, icky looking and then become half defoliated. Ground watering is it’s preferred daily moisturizing treatment. One can place it in a corner the sprinkler doesn’t hit and water that section by hand once or twice a week and it will reward you very nicely indeed. Since Phlox is rather tall, this avenue of placing it in the back corner works out well. It likes the moisture but not on its leaves. Roses fare better this way as well, especialy since one cannot control what the heavens will pour down. Less black spot and such other marring problems will occur, if ground water is used vs. overhead.
Lavender on the other hand loves it hot and dry. It doesn’t mind what heaven pours down IF there is a good drainage structure where the roots are. Too much water retention and it will slowly die. To conteract good soil water retention where one would like to plant the ever so beloved lavender row, a blind drain is required. It is called “blind” because on the surface you do not know that it is different from the rest of the area. In a planting area that is scratched once or twice a month some of the substructure will mix into the top surface and change the color of the topping soil. But once the bed fills no one will see this. (Surface scratching, by the way will put much needed air tunnels to roots, create more water availability to roots, and lessen the amount of weeding one must do, if it is done twice a month.)
The smaller the particle size of soil, the moisture it will retain. Clay having the most minute pieces and sand having the largest. Each person’s garden area will have a totally different soil structure. If you are in hard clay, we would advise that either you excavate 6″ of clay and fill with 7 inches of peat/topsoil 50-50 fill or raise the bed at least 6 inches above the harsh environment of the clay. Raising it is much less labor than excavating! Not too many things will do nicely in clay. The only way around it is correction. Once you have nice workable soil, with good moisture retention, yet good drainage – you can go about planning what goes where and how to amend each area for certain plants.
To get good drainage, you need to go down at least 4-6 inches, depending on the plants requirements. Sharp drainage is engineered with pea gravel in a 2″ layer, followed by 2″ of coarse sand, topped off with 2″ of your rich garden soil. In times of extreme moisture the worst of it will lay in the gravel bed. The gravel there also holds more heat than the moisture retaining soil, therefore using the warmth to do away with excess water faster. Variegated irises planted with a bed of road gravel 4″ beneath the surface will grow three times more lushly than those in average garden soil – they love that heat! Heat and drought loving plants are much happier in that environment when regular water is received. It is the retention that causes decline and not what comes from above. More moderate drainage would be created using 3″ of sand and 3″ of soil on top. Since each plant has different needs, your engineering of drainage will require a bit of working on. But it opens doors to what you can put in a planting as happy bedfellows that no drainage field would never allow you to attempt.
Ligularia
Plants such as Ligularia need loads of moisture. To truly enjoy these types of plants you must keep the soil moist at all times. So to plant these in a happy spot, average garden soil (50/50 peat-topsoil mix) must have good composted humus worked in and layed on top as a mulch. This holds water and coolness where it is needed for the roots to stay wet enough. Another neat trick that might aid in keeping these hungry types lush would be a water reservoir or two at their bases. Using an inverted 20 oz. pop bottle with the cap on and bottom cut off. Then 3/4 of the way up the bottle poke a small hole every inch. The water in the reservoir only leaks out when the water in the soil is depleted. So it slowly oozes moisture where it is needed. Refilling it would depend on the heat index and the amount of rainfall or irrigation in a given spot. To keep the soil from filling the bottle, a piece of landscape fabric, a hunk of old polyester fabric, or even the foot of an old nylon stocking, rubber banded in place allows moisture in while keeping most of the dirt from washing into your reservoir.
Tulips
If tulip bulbs are rotting in an area due to heavy spring and fall moisture a more aggressive drain system is needed that will carry the water down and out more quickly. Water runs down hill, so an incline to your drain bed is needed. The more water, the more layers of decreasing size fill is needed and the deeper one must go to drain the area. Sometimes you can over do drainage and even daily watering will not keep things moist enough! If that problem occurs, excavate and change your “recipe” to lessen the sharpness of draining. As with all things, experience is good guidance as to what is enough and what is too much. Heavy water problems can be solved with this system. The bigger the area, the bigger your drain field.
Using successive layers of 1-2″ roofing stone, pea gravel, coarse sand and topsoil or garden soil. Some drains go down a whole foot or more. The layered field can also be used with slotted tile pipe in a sock, attached to solid pipe in some severe situations. A one to two inch decline over many feet can take a ‘pond’ in your lawn or garden out to the woods or curb; to an area that it is no longer a detriment to whatever you are trying to grow in that spot. This same system was used repeatedly over the coarse of decades by my father who specialized in “corrective drainage” while in the landscape contracting field in.
We employed it in many planting areas of customers yards with much greater success of what we could grow in any given customer’s yard. (It was also used to correct basement flooding.) This will widen the choices of what you can grow together under “normal” garden conditions quite a bit, no matter what your limitations are at the moment.
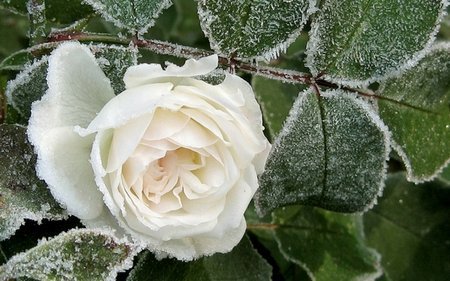
Frosty winter gardens are much more difficult to handle than frost free areas as wet frozen roots are a major cause for killing the plants. What to do in your frosty winter garden?
1. Lawn: Don’t allow frost or dew to dry on the grass. Never try removing the dew with the help of a broom. Early morning is the best time to sprinkle water on the grass. To resist the winter chill, give urea or ammonium sulphate and flood it immediately. Do a treatment of sludge as it creates warmth. In areas receiving heavy snowfall, clean your lawn of any debris as once the snow comes, these can smother your grass, damage your turf and leave your lawn vulnerable to diseases.
2. Herbs: Some frost-sensitive herbs like basil should be brought indoors during winter. Cover your plants with red thin cloth in the evening and put in a shade or in your veranda which also gets enough sunlight.
3. Roses: In order to save roses in beds from frost, feed farm manure to bushes of roses around this time of the year. Make sure your plants are insect, mite and disease free and all fallen leaves are picked up before you apply any winter protection materials. Water them, keeping a gap of light to 10 days.
4. Chrysanthemums: Cut off the main stem after flowering is over. Set aside the pots and water sparingly. If they are outdoor chrysanthemums try protecting them with a plastic sheet at night but don’t overdo wrapping your plants.
All indoor plants should be exposed to sunlight during the day and kept back in the evening as most of them get easily affected with winter chill. The short days of winter can very hard on house plants. To avoid frost bite, do not let dew dry on any plant. Don’t water as often and it’s always better to sprinkle water on leaves early in the morning. Most plants rest during winter, hence fertilization is not necessarily required.
Areas receiving cold winds can also completely damage your garden. Broad leaf trees are quite vulnerable in cold winds. Depending on your frosty winter garden layout and size, try creating a screen to act as windbreaker which can filter and protect the plants from chilled winter winds. Depending on the plant type, containers can be wrapped in very cold areas and moved into a protected area such as greenhouse. Grouping pots together also helps as an isolated pot would be more prone to get cold and frost bite. Create a circle, keep small plants inside and surround them with tall plants acting as a cover to keep them warm.
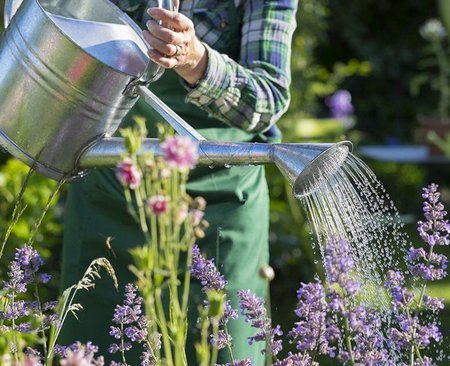
Your Cottage Garden In June – June is invariably a busy month for the keen gardener with general garden maintenance consuming the majority of your time. Seedlings should be watered early in the morning and again late evening particularly if you have had a hot summer’s day. Whilst watering inspect the plants as this is an excellent opportunity for you to spot any possible problems long before they develop. Look for the beginning of any diseases or infestations for example greenfly and apply treatment to any of them early on prior to them getting out of hand.
When the weather conditions are very hot probably the single most crucial thing you could do in the garden would be to make sure the plants are kept properly watered.
If you have a vegetable plot in your summer garden it is even more crucial to keep the plants well watered. When it comes to watering the most important thing to remember is that you should never water in the heat of the day and always avoid watering in direct sunlight. Do your watering early in the day prior to when the sun is too high or later in the evening as soon as the sun has gone down. You also need to ensure that the root on your plants receive a good soaking don’t just simply sprinkle water across the foliage.
Always check your fruit shrubs and bushes for hazardous bugs and disorders, and attend to as needed. Arrange a net structure all around ones soft fruit shrubs and plants like strawberries, tomatoes, berries etc. These will be a superb meal for a variety of birds and you could soon find your plants stripped of their fruit.
In June you will also be able to plant later season vegetable and flower plants so now is the time to check out the garden plants for sale at your internet florists. No matter whether you are looking for cottage garden plants or plants for your country estate we have exactly what you need.
Landscaping The Summer Garden – An important thing is natural landscape or the terrain of the lawn and the garden area. Whenever possible, it would be great to work with landscape than working totally against it or going towards extraordinary efforts in making changes to natural landscape of the lawn as one can quite easily and very beautifully plan the summer garden and go with flow working well along with natural terrain of the lawn and also garden area.
A way in which it can be accomplished is by taking quick surveys of the lawn. This would be more than any cursory visual survey. One would need to walk the lawn and the corresponding area in which the garden space is being planned to be implemented.
You would need to measure terrains and take notes of the inclines and slopes. When one is at it, they must study the conditions of soil and check if there are areas which seem particularly inhospitable to plant. When such types of areas exist in the garden one must decide what should be done about them. We should check if it possible turning the patch into water feature or similar other attractive addition in the summer garden than having some bare patch in midst of flowers, plants, and vegetables.
One must also determine the right amount of shade a particular place would receive and, how shade can be created for those plants, flowers and vegetables when in the direct sunlight. Indirect sunlight suits well to few plants. This could be accomplished if we plant them creatively within shadows of plants, shrubs, and vegetables which grow quite taller or even by using the rocks for creating shade. Climbing vines on the trellises or the fences so as to create artificial shade is also suggested.
After we have good feel for terrain and the landscape of our summer garden we would need planning for vegetables, flowers, and plants which would be used. The vegetable gardens tend to be not very aesthetic in nature often being the easiest for landscaping, as it is more of a need than some beauty. If one is planting some flowery summer garden, it is likely that they are planning to bring in some degree of exotic beauty in their garden. In this case it could be decided if one wants to keep flowers and plants in a specific color scheme or also if dramatic blues or greens require combining with some bright and vivid yellows and reds. This would be a personal decision but would affect greatly upon the appearance of one’s garden when things are said and done.
One may landscape the garden according to amount of actual time and the effort available for devoting towards working on your garden in a given week. Few plants need more care than few others. If you are looking for a garden basically the sow and go type, then you must make sure it gets filled with flowers and plants suited for that kind of low maintenance. Many vegetable gardens need good deals of tending so as to flourish and cannot be acceptable in such situations.
If you are totally lost about landscaping the summer garden, you may find it beneficial and worth the effort having a team of experts coming in and doing the landscaping for your garden. When procuring the services ensure to check either into the maintenance program with them to keep up landscaping or get them to provide with a low maintenance kind of landscaping which you would be able to keep up with and duplicate upon your own.
Gardeners find tasks of landscaping the summer garden to be highlights of the growing summer season. Even if anyone is not among those, the above suggestions are always recommended to give you a good start along with other helpful tips about getting the garden landscaped; ready to grow.