Late Summer Tasks In Your Garden – This is usually a time of hot, dry weather, when there is a natural lull in the garden, and the efforts of spring and early summer sowing will have paid dividends. The chores of early fall can wait until the holidays are over and cooler weather begins to return. Most of this month’s work in the garden involves watering and routine maintenance like mowing and hoeing, and clipping hedges.
If you are tempted to leave any tender plants outside all winter, seeing if they will survive, then take some safety precautions. Snip off a few cuttings, and pot them up, tending them all winter just in case the patent gets killed.
Constant soaking wet soil is as likely to kill the parent as freezing temperatures. Tackle the latter by adding a thick mulch.
The plants at their best in the late summer are: begonia, canna, erigeron, agapanthus, hibiscus, lobelia, lavender, alcea, fuchsia, lilium, hydrangea and hebe.
Hydrangeas
The flower garden tasks
Deadhead plants regularly. Clip beech, holly, hornbeam and yew hedges, and most evergreen hedges, if not already done. Feed plants in containers and trim flowers stems of perennial plants like Dianthus (carnations). Feed and disbud dahlias as necessary; use a quick-acting general fertilizer or a high-potash feed, but do not boost with too much nitrogen.
Plant colchicums to flower in the fall season. Plant bulbs for fall display and don’t forget to start planting spring-flowering bulbs. Start sowing hardy annuals to overwinter (only in mild areas or if you provide winter protection). Transplant polyanthus seedlings into their flowering positions in beds and borders.
Take fuchsia and pelargonium cuttings and prune rambler roses. Mow the lawn except in very dry weather. Water the lawn in dry spells, but a few good soaks will be better than many sprinklings that do not penetrate deeply.
Fuchsias in the garden
The greenhouse tasks
Pot up pelargoniums and overwinter indoors. Reduce the height of each plant by at least half and it will soon send out new shoots. Pot up Scaevola, Gazania and osteospermum and overwinter on an indoor windowsill or in a frost-free greenhouse.
Plant bulbs for a spring display. Plant biennial bedding plants in containers for a spring display (raised from the seed sown last spring). Plant hyacinths for early flowering under glass.
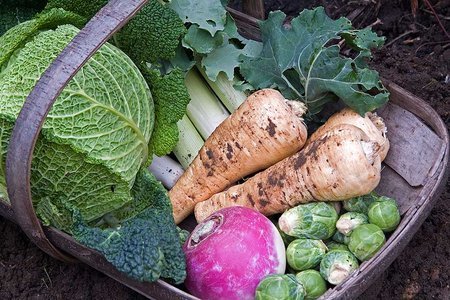
Vegetable Garden During November – This month beds that were filled with late season produce are now laid bare, stems of runner beans have died off twisted around their supports and the greenhouse is all but emptied. However, there will be a few winter crops growing strong. Winter brassicas such as kale and brussels sprouts and beds of winter lettuce will provide a welcome taste of home produce during the winter months. There are still jobs to be done in even the smallest vegetable garden, there are some early varieties of spring crops to be sown and plenty of tidying to be done. So before you wrap up and head outside take a moment to read through this short list of essential jobs to be doing in the vegetable garden during November.
Harvesting in the fall
Clear away climbing bean plants and then pull up, clean and store away the cane supports. Any old summer crops such as peas and courgettes should be pulled up and composted. If the soil is not too wet, dig over emptied beds and fork in organic material to help improve the soil for next year’s crops. Lift and divide any clumps of rhubarb that have become congested. Build up soil around the base of Brussels sprout plants to give them extra support. It is also a good idea to protect winter root crops such as parsnips from freezing soil by surrounding the base with straw or other insulating material. Jerusalem artichokes are an interesting vegetable to grow and will provide you with a versatile root to store for winter use. Cut the tall stems back at this time and dig up the tubers to store. Jerusalem artichokes make great soup and are delicious roasted or made into chips.
Herbs on a kitchen windowsill
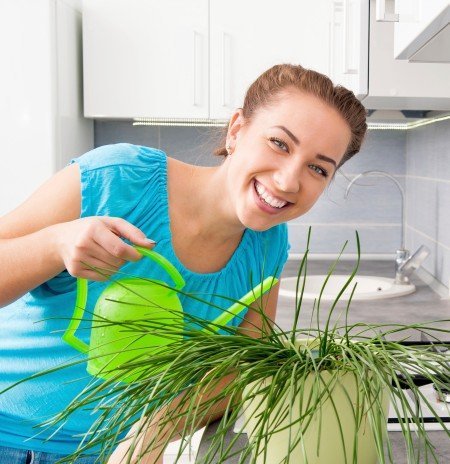
Any stored fruit and vegetables should be regularly checked and any rotting ones removed. Early varieties of broad beans and peas can be sown under cloches. Also plant out fall onion sets and garlic. If you grow fruit now is the time to plant new fruit trees and bushes. It is also a good time to take hardwood cuttings from fruit bushes such as red currants and gooseberries. Towards the end of the month you can start to prune apple, pear and fig trees. Cut away the stems of fall fruiting raspberries to soil level. Finally, pot up herbs such as parsley and mint in garden planters to sit on a kitchen windowsill or in a sheltered spot such as a porch where they can be used for winter cooking.
Late Winter Gardening Tasks – In favorable areas late winter can be almost spring-like, especially in a mild period, but don’t be lulled into sowing and planting outdoors too soon. If the weather turns cold, seeds will not germinate, and seedlings and plants may receive such a check to their growth that they do not do as well as those sown or planted later. Concentrate your efforts on indoor sowing, but make the most of frames and cloches, too, for early crops.
One way of getting plants off to an early start (tomatoes and lettuces, for example) is to sow them in small plastic containers, clearly labelled, in a heated greenhouse. This means that when the spring temperatures do pick up, they can be moved outside, under cloches especially at night when the temperatures can suddenly drop.
This is also a good time to check the vegetable garden, forking out the roots of perennial weeds. Also continue breaking up heavy lumps on clay soil. If left, the soil will take much longer to heat up in the spring, and the seeds will find it extremely difficult to get off to a flying start.
Preparations for the flower garden
– Plant climbers,
– Mulch beds and borders, especially after a night of heavy rain,
– Insulate the cold frame for extra protection against the coldest weather,
– Sow sweet peas,
– Pinch out tips of fall-sown sweet peas,
– Tidy up the rock garden and apply fresh stone chippings where necessary,
– Check labels on shrubs and border plants and renew it necessary,
– Lay a new lawn from turf, provided the ground is not frozen nor waterlogged.
Dahlia tubers
In the greenhouse and conservatory:
– Take chrysanthemum cuttings,
– Pot up chrysanthemums rooted earlier,
– Take dahlia cuttings,
– Sow seeds of bedding plants and pot plants,
– Prick out seedlings sown earlier,
– Increase ventilation on warm days,
– Make sure the glass is clean so that the plants receive plenty of light,
– Clean all pots and trays in readiness for saving spring seed,
– Clean all garden tools, scraping off mud, and oil the wood of spades and forks.
Flower Garden During June – June in the garden and the season is in full swing. Even in the smallest garden there is plenty to do at this time of year. From transplanting seedlings you have raised in the greenhouse to cutting back early flowering plants to make way for colorful annuals. So before you put on your boots for a day in the garden, read this short reminder of some of the vital jobs to be doing in the flower garden during June.
If you haven’t already done so, now is the time to plant up a beautiful summer basket. By now the risk of frost has passed so you can plant it up right now and hang it straight out. Make a visit to your local garden center where you will find a huge variety of colorful varieties of annual plants well suited to a hanging basket.
Plant up your hanging basket at the beginning of the month and you will have a stunning display in just a few weeks. Keep the basket well watered in dry weather and feed once a week.
If you have noticed suckers growing around the base of standard roses remove them with a sharp pair of secateurs. Watch out for pests like greenfly and treat with soapy water. In the herbaceous border make sure all tall growing perennials such as foxgloves and delphiniums are tied to plant supports to prevent them from flopping over. Cut back early flowering shrubs such as camellia and rhododendron after flowering. Do the same with early flowering herbaceous plants such as lupins and flag iris after flowering to 4 or 5cm from the ground. Fill in any gaps in the flower border with annual bedding plants.
Pinch out the growing tips of dahlias you planted early in the spring to encourage the plant to bush out. Sow seeds of sweet williams, wallflowers and forget-me-nots. Towards the end of the month is the time to start propagating some of your favorite flowers. Take cuttings from dianthus (pinks) and collect seed from foxgloves. Propagate flowering climbers such as wisteria, honeysuckle and clematis using the layering method.
Vegetable Garden During August – August and the summer is in full swing. By now you should be harvesting many of the fruit and vegetables you have worked hard to grow throughout the season and enjoying the unique taste of fresh salad crops, potatoes, tomatoes, peas and beans homegrown. However, in-between enjoying the fruits of your labor there is still plenty to be doing in even the smallest vegetable garden. So take a minute to read through this short reminder of some of the vital jobs to be doing in the vegetable garden during August.
Bend over the tops of onions as they ripen and sow other varieties of onions which will mature from late June or July next year. Order garlic bulbs ready to plant out in the fall. Make other preparations for late and next season by sowing spring lettuce, winter spinach, spring cabbages and late carrots.
If you grow fruit, continue to pick plums as they ripen. Save some to make jam to remind you of the summer months once winter arrives. Prune out the fruiting canes on summer-fruiting raspberries. It is also time to prune trained forms of fruit tress such as espalier and cordon apples. Make sure that blackberries and fall-fruiting raspberries are netted to protect them from hungry birds. Wasps can be a pest around soft fruit so hang traps near by to catch them.
Pinch out the tops of outdoor tomatoes as further fruits produced are unlikely to ripen. However you can leave them to fruit if you intend to make green tomato chutney. Towards the end of the month sweetcorn should be ripe and ready to pick. Plant out strawberry runners that have rooted and pot some up in the greenhouse for early fruiting next season. Stake brussel sprout plants that have grown tall to prevent them being blown over. Towards the end of the month young spring cabbage plants can be planted out and onions can be harvested. Hang or lay them out in a dry airy place to dry out before storing.
Take Care Of Your Garden Containers – Once you have decided what plants that you would like to place in your garden planters and containers, then you will need to get the container soil ready for each pot. When working with potting mix, always make sure that the mix is moistened before getting started.
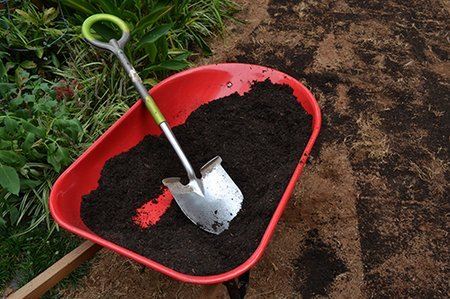
There are a few methods to ensure that the potting soil is pre-moistened and ready for your planters. Firstly, this one we call the wheelbarrow method. Place all of your potting mix into the garden cart and then add plenty of water. With your trowel or spade, make sure that the soil is very moist. You can tell when you can make a fist with the soil and it will hold its shape. The soil will then be a dark brown in color and this rich, moist soil is ready for your containers.
The second method, and this takes a little longer, is to fill your large planters, pots and containers with the dry potting soil. Then run water into the mix, making sure that the soil does not run over the top, and let it stand. In a few hours, the potting mix will be well dampened and you can moisten again when you are ready to plant. This method works well when you want to place the containers on your deck, patio or in the garden before you get down to planting.
Thirdly, and this is what we call the ‘in-the-bag method’, carry the bag of potting soil to your containers. Cut a hole in the top of the bag for your hose and also in the bottom of the bag to let out the excess water. Then place the hose in the bag and run the water through. Once the soil is very damp, leave the bag overnight to ensure that the water is all absorbed before you will your pots. Then open the bag, stir the soil and gently water again if it has dried out before use.
If you wish to add water retention material to your soil mixes, the time to do this would be before you dampen the soil either in the wheelbarrow or in the container itself. There are also slow release fertilizers available, the best time to add these granules would be before dampening the soil mix as well.
When your potting soil is ready, fill the containers to one to two inches from the top. Fill your containers with those beautiful plants and then gently firm down the soil. Water thoroughly and you’re all set.
Regular fertilizing is a must especially in plant-packed containers. All of your material is fighting for those nutrients. Feed your containers at least once a week with water soluble balanced fertilizer or every time you water.
One last word to ensure your containers always look their best. At the beginning of the season, pinch back your herbs and those plants that tend to branch out to encourage fuller growth. Then regularly pinch back to keep them compact and to encourage growth where you want it.
Remove flowers as they fade to keep your planters and containers looking fresh. Use sharp shears when cutting back. Groom your containers often to remove any dead leaves, damaged foliage and to check for any pest problems before they become big problems.
Give Your Plants The Humidity They Need – Cold air requires only a small amount of water vapor before it becomes saturated, and so on an average winter day the air is moist. When you turn on a radiator to warm up this cold air, its capacity to hold water vapor is greatly increased. As the room becomes comfortable the amount of water vapor in the air is no longer enough to keep it moist. The air becomes ‘dry’; in technical terms the relative humidity has fallen.
Central heating in the depths of winter can produce air with the relative humidity of the Sahara desert.
Very few indoor plants actually like such conditions; many foliage plants and most flowering plants will suffer if you don’t do something to increase the humidity around the leaves. You can, of course, avoid the problem by finding a moist home for your plants – the kitchen, bathroom or a terrarium, but the living room atmosphere will be dry. You can use a humidifier to increase the moisture content of the whole room, but it is much more usual to use one or more of the techniques
below to produce a moist microclimate around the plant whilst the atmosphere in the rest of the room remains as dry as ever.
Misting. Use a mister to deposit a coating of small droplets over the leaves. lt is best to use tepid water and under cool conditions do this job in the morning so
that the foliage will be dry before nightfall. Cover all the plant, not just one side, and do not mist when the foliage is exposed to bright sunlight. Misting does more than provide a temporary increase in humidity; it has a cooling effect on hot sunny days, it discourages red spider mite and it reduces the dust deposit on leaves.
Grouping. Plants grown in pot groups and indoor gardens have the benefit of increased moisture arising from damp compost and the foliage of surrounding plants. The air trapped between them will have an appreciably higher relative
humidity than the atmosphere around an isolated plant. The best method of raising the humidity is to use a pebble tray. There is a danger of too much humidity when
grouping plants together – make sure that there is enough space between them.
Double potting. Use an outer waterproof container and fill the space between the pot and the container with moist peat. Keep this packing material thoroughly and continually moist so that there will always be a surface layer of moisture to evaporate and raise the relative humidity. Double potting does more than raise the humidity – it provides a moisture reservoir below the pot and it insulates the compost inside the pot from sudden changes in temperature.
Winter Hanging Baskets – The plants that will more readily survive the lower temperatures that winter brings. Of course, the first plants that come to mind are evergreens. Little conifers and box look quite nice as an architectural addition to winter hanging baskets and will last all year round. But just because we’re moving into winter that doesn’t mean we have to compromise on the color in our baskets, although of course our choices will be a little more limited.
There are plenty of plants that will go right through the winter and keep our houses looking beautiful, many of them flowering. Here’s a few ideas for flowering winter plants to keep your hanging baskets looking as lovely as they do in the summer.
winter hanging basket
Winter Pansies and Violas
Pansies are a great choice for baskets, being hardy enough to survive most of what winter can throw at them. They also come in a variety of colors, hard to find with other winter flowering plants. Choose the brighter colored varieties – whites, primroses, yellows and reds – to brighten dark winter days. Darker varieties, the deep blues and purples, won’t show so well without as much light to make them sing. Pansies will be happy in most soils, and follow the sun (much like sunflowers) so place them in a sunny position if you can.
Violas, with alpine genes in their history, are hardier than pansies with smaller flowers but more of them – quantity can make up for quality here. Although perhaps a little less showy, they are less likely to flop over and will also be less affected by windy weather.
Dead-head both varieties often through the winter to encourage new blooms.
Cyclamen
Hardy Primroses
Primroses (Primula Vulgaris) are native to the UK and Europe, and some more temperate Asian countries. They grow in tight-knit clumps so make a great centre piece for a winter basket or pot. Try a few different colors with some trailing ivy around the edge for a simple but effective winter basket.
Cyclamen
The great thing about cyclamens is that you don’t have to be tending them every minute of the day to keep them in fine fettle. They’ll do pretty well left to their own devices, and let’s face it, who wants to be outside all day looking after baskets in grim winter weather? Their other great advantage is their colors – deep, bright reds, pinks and purples will bring a welcome splash of color to help you through the driest months of the year. They’ll flower all year round, even through January and February, so they make a great choice for a winter basket.
Polyanthus
The polyanthus is, like the primrose, a member of the Primula family. They are resistant to frost, and whilst they might not flower right through the winter, they will be the first flowers in early spring, sometimes before the daffodils. Long-stemmed, they make a great centre piece for a winter basket with lower growing violas or winter pansies around them.
Erica Gracilis
Sometimes known as Cape Heath, E. Gracilis is very like heather with magenta and sometimes white flowers. It will flower from early autumn right through to spring, so can make a great addition to a winter basket. Watch the position though, and the temperature. E. Gracilis isn’t as resistant to frost as some winter flowering plants and may actually have to be brought in on really cold nights.
Erica gracilis
Iris Reticulata
This is a very early flowering variety, usually putting out it’s first flowers in early February. Plant some bulbs in your basket in early autumn at about twice their depth and be surprised by their appearance in the darkest days of Winter when it seems as if spring will never come! Colors range from light blue to violet so will go particularly well with some yellow pansies or primulas.
Architectural evergreens
Whilst these plants are often not flowering (although some varieties of ivy will and heathers do of course) they make a great addition to any basket, adding architectural interest and variety.
Ivy. Ivy really has to be the mainstay of trailers for hanging baskets at any time of year, but they’ll add some welcome architectural interest to your winter baskets. Variegated types like Hedera will add a little interest. Either in the top around the sides, surrounding pansies and polyanthus, or peeking out of holes around the sides of the basket, ivy couldn’t be easier to grow. Don’t forget that some varieties will flower, too.
Box (Buxus). Increasingly popular in garden centre hanging baskets, Box can be an architectural centre piece and can be trimmed into all sorts of interesting shapes – if you have the time, the patience and the inclination.
Regular care of winter hanging baskets
Don’t forget to water! Even in winter your hanging baskets will dry out, especially when the winter winds hit them. Water regularly to keep them fresh and blooming, keeping the compost moist without letting it get soggy. Avoid getting the leaves and flowers wet when watering in winter since retained moisture might freeze and damage your beautiful spray of color.
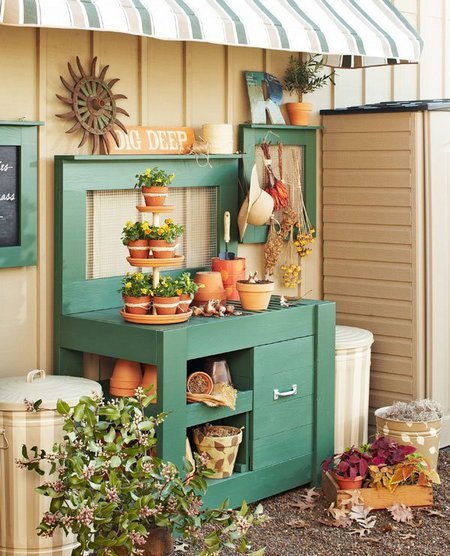
Potting Table Ideas – If you have been shopping for a potting table, you have recognized that they aren’t all alike. Some follow a basic design, while others incorporate extra features for additional storage and better organization. If your gardening supplies have become a mess, maybe these features can help you.
Nearly every potting table offers some shelves in addition to the work space. Generally, the bottom shelf will be wide and sturdy. This shelf is the best place to store heavier and larger items – things like bags of mulch and potting soil, planters and buckets, watering cans. Some potting tables have more than one wide shelf. If you are concerned that some tall items might not fit in a multi-shelf unit, measure the items you plan to store.
Then when you shop, you can compare the measurements to the table’s specifications. Taking inventory of the items you will store will help you select the table that fits your needs.
Potting table
Many potting tables also contain a small upper shelf at the top of the unit. The small shelf can hold gardening tools or small seedlings and cuttings. You could also place packets of seeds on this shelf.
You might wish to look for a potting table with a covered bucket for soil mixing. In some models, you can pull a piece of wood from the work table. This wood covers an inset bucket or basin where you can mix soil. To use the full space, you can easily replace the cover until you need to dip into the soil again.
A potting table may also come with additional storage features, including hooks and drawers. Hooks may appear on the sides or along the back. You can hang gardening tools, aprons, or gloves from these hooks. Drawers might also be used for storing these same items. Or perhaps you have other small paraphernalia that currently have no home. Drawers might be a feature you don’t want to do without when you buy a potting table.
Many potting tables have been designed specifically to be easily portable. Some have light frames, no more than 20 pounds. Others come equipped with wheels, so you can roll your work station all around your yard or garden. A table that is easy to move will be important if you can’t set up the table in a location central to all your gardening work, or if you don’t want to make numerous trips back and forth to your station while performing your work outside.
After you’ve considered the ways in which you want to use your potting table, and which features are most important to you, you can look for the right model. You can consider features such as shelving, soil basins, hooks, drawers, and portability. To make your selection easier, you might want to list your favorite features in order of priority. Select the model whose features match your list the closest. If you know ahead of time what you want, you will find a potting table (or potting bench) that will help to keep you organized and keep your gardening a joy.
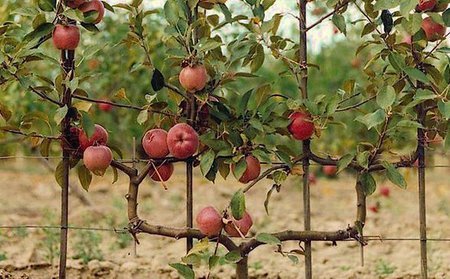
Training fruit trees – Cordons are single stemmed trees, fruiting spurs grow directly from the main stem – although double or even triple cordons can be created. Apple and pear cordons are generally planted at an angle of 45° and trained to a height of 1.8 m (6 ft). This produces a stem 2.4 m (8 ft) long. All cordons should be pruned in the summer; little winter pruning is necessary.
Pruning is simple. Cut back all laterals (side branches) to three buds beyond the basal cluster (the cluster of leaves nearest the main stem). Tie in the leader but do not prune it until it has reached 1.8 m in height. Mature cordons may need some of the fruiting spurs thinned in the course of time.
Espaliers
Espaliers are trees with branches radiating horizontally from a main stem – the fruit grows from spurs on the radiating branches. Before planting the tree, erect a horizontal wire framework with the wires 38-45 cm (15-18 in) apart. To create an espalier, plant a whip (a young single-stemmed tree) in fall. In spring, cut back the stem to a bud about 60 cm (2 ft) above the ground, making sure that there are two further buds below the top one. The tree will produce three shoots in the summer. Tie in the top one vertically and tie the two side shoots in at an angle of 45°.
Summer prune any other shoots that emerge to three leaves from the basal cluster. In the spring of the second year, cut back the leader again to three good buds and take down the first two side shoots from 45° to the horizontal. Tie the shoots on to canes attached to the wires. Repeat this each year until the tree has reached the desired height and spread. At this point the extension leaders should be stopped and the lateral shoots treated as if they were cordons.
Training apple trees- cordons
Fan-trained plum tree
To save time, try to buy what is known as a feathered maiden, a whip with side shoots and plant it in the fall. In late spring, cut back the central stem to the uppermost of two strong opposing laterals. Train these horizontally against the wall; the top side shoots should be about 60 cm (2 ft) above the ground. Tie these shoots in, then cut them back by a half to an upward-facing bud. They form the first ribs. During the summer, select two new upward-growing shoots and one downward-growing shoot from each branch, spaced evenly along the rib. Tie these in and pinch back any other side shoots to 1-2 leaves. Rub out any shoots growing inwards towards the wall or outwards. The following spring, cut back the new ribs by between a half and a third and during the summer select three new shoots from each of these. Continue this process on an annual basis until the tree has taken up its allotted space.
After the fan is established annual pruning consists of rubbing out any shoots that are growing in the wrong direction, pinching back new laterals to 6-7 leaves in mid-summer to help form fruit-bearing spur systems and the shortening of the laterals to 3 leaves when the fruit has been picked. Apricots should be trained and pruned in the same way.
Plums must only be pruned from late spring through summer as otherwise they are liable to silver-leaf disease which usually proves fatal.
Fan-trained lemon tree
Other fan-trained trees
The establishment of a fan-trained peach tree is exactly the same as a plum tree for the first two years but the pruning and training of mature trees differs after that. In the third year side shoots should be allowed to grow from the ribs every 15 cm (6 in) or so both on the top and underside of the rib. Tie these shoots in, and stop them when they have reached 45 cm (18 in) long. Pinch out all other shoots at 1-2 leaves. After fruiting the shoots that have born fruit are cut out back to the new replacement shoots that have been tied in. In the spring on mature trees the young shoots bearing blossom will have two buds at their base. These form replacement shoots and one of the buds needs to be rubbed out to prevent the tree from becoming congested. Keep another bud growing from the middle of the shoot as a reserve. Once the fruit tree has reached its allotted span pinch back any terminal growth to 4 leaves once it has made 6 leaves.
Organic Gardening Supply – Some gardeners now use nothing but organic products and tools. Organic gardeners need supplies that may differ a little from the conventional gardener in order to sustain their gardens.
To prepare the garden for planting, a shovel, spade and spading fork are priceless. A hoe is useful to remove the weeds in your new garden bed or to remove rocks. A scuffle hoe has a blade that points forward and cuts the weeds off at the surface. A pry bar can be used to dig up the large rocks or boulders that can be a problem in your garden.
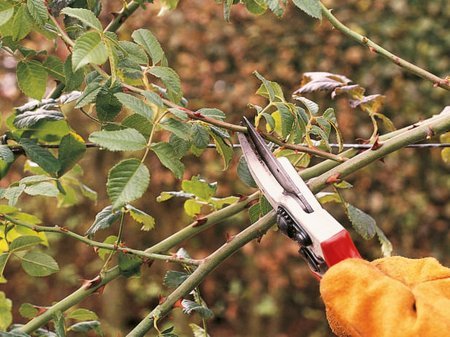
A garden always can use a good pruning. To keep those healthy flowers on your rose bushes, a periodic pruning with good quality shears is a must. Lopping shears will also make a clean cut on those prickly rose stems to ward off disease.
These however are the conventional gardening supplies that any gardener can use. For an organic gardener there are a few different items that need to be added to their organic gardening supply. Whereas the normal gardener has the choice of using chemical enhanced fertilizers the organic gardener can use bat guano or even worm castings.
Bat guano organic fertilizer
With these organic fertilizers all that is needed is a couple of applications per month. Worm castings are the tunnels that are created as worms move through the soil. This movement not only breaks and loosens the soil, it also adds fertilizing nutrients to the soil. Organic fertilizers like these help to increase the growth and health of plants within your garden. Therefore they are an essential organic gardening supply item.
Gardening can be compared to painting. The canvas is the ground and the brushes are the gardening tools. Many of the tools used by the ordinary gardener and the organic gardener are similar but the organic gardener needs a few specialty items to make his garden or canvas have that extra advantage of look, taste or smell.
Organic gardening is 100% all natural and great for the environment. Why don’t you switch to organic gardening and see the difference it makes to your life.
Improving The Conditions Of Your Garden – Find out how you can stop relying on others for your fruits and vegetables, by building and maintaining your own home organic garden, full of delicious produce.
First of all, know what grows in your region. When you see the wide variety of seed packets offered online, it is easy to get sucked into the idea of growing everything and anything! In reality, though, only some of them may flourish in your regional environment. Study up on your region and what crops can survive.
If you do not want to expose your family to harmful pesticides in your garden, consider using organic pesticides. Organic pesticides do not have the harmful chemicals commonly found in ordinary pesticides. Fragrant herbs like rosemary, basil, and mint are often disliked by pests, and they are good choices to plant around your garden to ward off pests.
Pre-soak your seeds to keep them healthy. Place a couple seeds in each garden container, then fill it close to full with water. This will allow seeds to be watered and they will get a kick start when growing. Your seeds will then have the best chance possible to survive to maturity.
Grow native perennials in your garden to attract local wildlife. Native vegetation is the best food source for your native animals. You will see more birds and colorful insects using this method. This is an easy way to attract wildlife, as native plants generally require less work from you in order to thrive.
Improve the health of your soil before your plant your crops and seed. 3-4 weeks beforehand use organic compounds like mulch, fertilizer, and compost to increase the nutrient value and retention of your soil. It will also improve the retention of water, create a soil buffer, and more.
For basic vegetable or flower gardening it is often not necessary to buy the most expensive gardening tools and accessories. Visiting discount stores will often allow you to find basic tools at a low price. You should also be on the lookout each spring for most local supermarkets to set up an aisle or display with gardening tools you can get for a good price.
When gardening, it is wise to rotate your crops, especially if you are growing more than one crop of fruits or vegetables in your garden each year. This helps to conserve the nutrients in the soil. It also helps to avoid diseases in the soil. Even with crop rotation, nutrients needed to be added back into the soil after each planting season.
Using a garden box to grow your vegetables is water efficient. Certain vegetables do not need a lot of root depth to grow. Plant these types of vegetables in a large planter box. When you water all the water will go directly to the roots of the plants. Grasses and trees will not have the chance to rob the vegetables of water.
When planting rose bushes, the location is essential. You need to choose a location that gets plenty of direct sunlight. Roses need at least 6 hours of sunlight, in order to grow as large as they possibly can. It is important to find the perfect spot before planting them in your yard.