5 Tips to caring for plants in Northern California

0

Plants are a great addition to any household. They improve your environment, whether indoor or outdoor, and are generally beneficial for your health. They absorb carbon dioxide and release oxygen giving you a literal breath of fresh air. Certain species of plants have also been found to have air purifying properties. Garden mums, spider plants, and snake plants are just some of those capable of removing air pollutants such as ammonia, benzene, and formaldehyde.

In taking care of your plants, you have to consider the weather. If you live in Northern California with bay area landscapes, the climate is mostly warm and dry in the summers and mildly wet during winters. Common houseplants that thrive in this weather are dogwoods, lilacs, and elderberries. To know more about how to take care of these types of plants, read on:

  1. Water your plants well

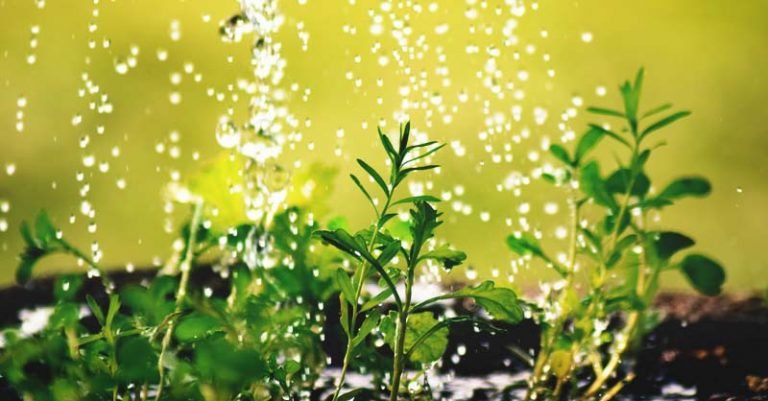
Watering properly is important in keeping your plants healthy. Too much watering may cause the roots to soak and not get the oxygen it needs to function normally. Underwatering, on the other hand, doesn’t let the roots absorb the nutrients it needs from the soil. When it comes to watering your garden, you need to maintain good moisture levels on the ground to promote root growth. Ideal times for watering falls early in the morning or late in the evening. Also try to keep the leaves dry when you water to avoid plant diseases and burn marks from the morning sun. Finally, you need to ensure that the water is reaching the roots of your plants. If you you have potted plants, you’ll know when water starts dripping underneath the pot. But you have to water gradually to let the water penetrate fully.

  1. Give them proper sun exposure

Giving your plants the right amount of sunlight is essential in a healthy growth. The sun is essential in photosynthesis, where plants consume light and convert it into energy to fuel their growth. The morning sun is found to be most beneficial to plants. Exposing them to direct sunlight for 6 to 8 hours a day makes for good results. It doesn’t have to be continuous exposure too, as you risk exposing them to the scorching midday heat. You can put them out in the morning for 4 hours, shade them in noon time, then put them back out in the afternoon for another 4 hours.

  1. Watch them carefully

Spotting signs of stress in your plants is very important. Are the leaves getting pale? Is mold growing? Are the flowers falling off? These the are signs you have to notice regularly to keep your plants in good shape. They may be not be getting enough water or enough sunlight. Or you may be facing an infestation in your garden. Knowing the symptoms can help you identify the correct solution.

  1. Wait before you prune

Especially in hot weather, you must not immediately prune your plants the moment you see a sign of wilting. Doing this and you risk stressing the plant out even more. Imagine yourself having a bad day at work, only to be further aggravated when you get home. That’s double the stress you will feel, and so do plants. If your town is experiencing a heat wave, wait for it to pass. Most of the time, when the conditions go back to normal, the leaves may rebound and be healthy again. After then, that’s the time to snip off tips and stems that didn’t make it.

  1. Add some mulch

Adding mulch to your soil gives insulation and provides extra water to your plants. Go ahead and be liberal in adding these, they help prevent your plants from overheating and gives it additional moisture. It retains water and helps keep your roots cool. It also helps prevents weeds from growing and competing for nutrients.

Basic Lessons About Gardening

0

Basic Lessons About Gardening – If you’re seriously interested in knowing about gardening, you need to think beyond the basics. This informative article takes a closer look at things you need to know about gardening.

Planting methods. There are several methods for planting. Choosing any of these methods depends on the vegetable, the size of your garden, and your preference. Three methods of planting, namely, single rows, wide rows, and hills are explained as follows:

A) Single rows: In this method, seeds are sown in rows or lines that are spaced equal distances apart. The distances between the rows and between the seeds within the rows differ from vegetable to vegetable. If you want the rows to be straight, which gives a pleasant appearance to your garden, stretch a string between two stakes and sow the seeds along it. If you think this is too much work, use a stick to mark a line on the ground and try to make the line as straight as possible. With some practice, you will get it straight.

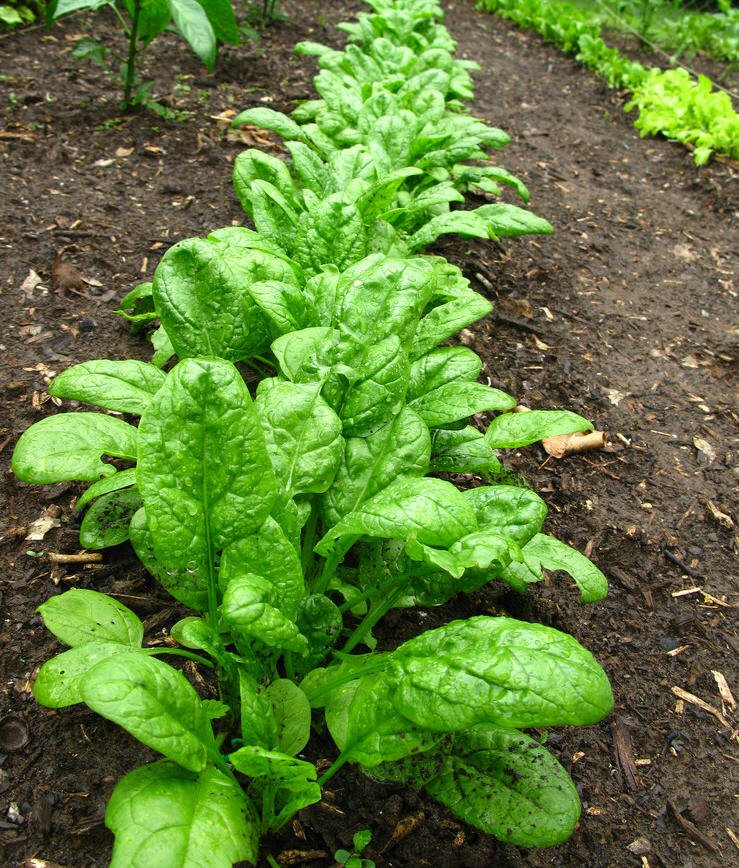
B) Wide rows: In wide row planting, seeds are sprinkled at equal spacing in both directions over a wide area. The width of the row varies from 6 to 16 inches. The row’s width is limited by your arm’s reach to the area in the middle of the row while standing at the edges. We find that wide rows are convenient and productive for peas and beans. In addition to giving high yield per unit area, they cut down on weeds. Wide rows are also good for starting leaf vegetables like lettuce and spinach. When the seedlings emerge, they can be thinned and transplanted elsewhere. Double rows are a special form of wide rows.

C) Hills: In hill planting, 3 to 5 seeds are sown close to each other. They need not be sown on a formed hill, as the name implies. This method is used for planting zucchini and cucumbers.

2. Crop Rotation. Crop rotation is the practice of planting each vegetable in a different location each year. The advantages of crop rotation are:

– The chances of transmitting diseases and insects to next year’s crop are reduced. Specific diseases and insects attack specific vegetables. These diseases and insects move from the plants to the soil, where they winter. If the same vegetable is planted in the same spot the following year, the diseases and insects will emerge from the soil and attack the new plants;

– Each vegetable absorbs trace amounts of specific minerals from the soil. If the same vegetable is planted in the same spot year after year, the minerals the vegetable needs to grow healthy plants will be depleted, resulting in a poor harvest;

– The roots of legumes (peas and beans) have bacteria that absorb nitrogen from the air and fix it on the roots of the plants and in the soil. To take advantage of the nitrogen they fix in the soil, the legumes should be followed by a leafy vegetable, such as lettuce and spinach, which needs nitrogen-rich soil. This is one of the techniques organic growers use to grow vegetables without the use of chemical fertilizers. It may be impractical to rotate every crop each year if your garden is small.

The following section should go a long way toward clearing up any uncertainty that may remain.

This problem can be overcome by taking the following measures: (1) choose disease-resistant vegetable varieties, (2) keep your garden clean of debris, and (3) watch for insects and diseases. If a plant becomes infested with insects, pick them by hand; if a plant is infected by a disease, pull it from the ground and discard it.

3. Gardening tools. Many gardening tools are available. The basic tools you need are a shovel, trowel, steel rake, tomato cages, and water hose or can. The shovel is used to till the soil, mix potting soil, move soil around, and cut the weeds if they grow big. Some gardeners use a fork instead of a shovel to till the soil, but we don’t.

The choice is yours. The trowel is used for cultivating the weeds, transplanting the seedlings, mixing soil or fertilizers, and filling containers with soil. The steel rake is used to grade the soil and to compact the soil over the seeds. Tomato cages are essential for supporting tomato plants. You can also use them to support running plants such as cucumbers and peas. Without them the plants will fall on the ground and their fruit will get into contact with the soil and rot. A hose or a can is used to water the plants in the garden and containers.

4. Proper gardening clothing. In the course of gardening, your footwear and clothes are likely to be soiled. You walk on dirt or mud, your clothes get in contact with plant leaves and stems, and your hands are soiled. You are also exposed to the sun. Your boots collect mud and will soil the floor if you walk directly into the house. Therefore, you should have a pair of old shoes set aside for gardening. Put them on before going into the garden and take them off before entering the house. Leave them in the garage or put them in a bag until you use them again.

Also, have special clothes for the garden. If you don’t, your ordinary clothes will be soiled no matter how careful you are. To protect your hands and fingernails from collecting dirt, use a good pair of gloves. Some are washable and can be reused.

5 Ways to Make Use of a Large Garden

0

Is it better to have a small garden where you can’t fit anything or a large garden that you can’t fill? We’ve found that, although great, having a large garden can be problematic for gardening enthusiasts who want to make it special. That’s why we have put together a list of 5 ways that you can make use of your large empty garden space. 

Get a pond

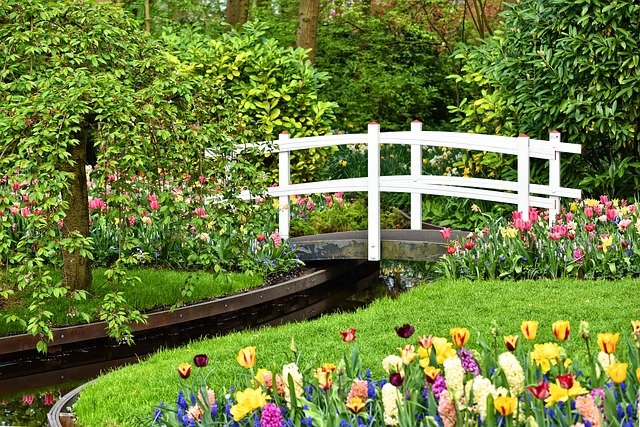
One way to fill your garden is to build a pond. This will create a focal point for your garden and filling the pond up with beautiful fish will have all your neighbours jealous. Make sure to get check which types of fish can survive in a pond before you buy! You could even take it one step further and get some fancy lights for around the pond to make it stand out at night.

Create a barbecue area

We might not always have great weather, but sometimes we get a glimpse of sun and by the time we’ve got the barbecue out its gone! We think that creating a barbecue area with a shelter so that your barbecue can stay dry (just in case) is a great idea. You can also build seats around it or even a picnic table to make it permanent feature. Think of all the amazing gatherings you can have over the summer if you get started on this now. To get you started check out some amazing barbecues here.

Create an outdoor play area

If you have kids, you might already have a climbing frame. If not, why not turn your garden into a mini football or rugby pitch? This is easily done with the paint and line applicator machines available from Bowcom. These machines will impress your kids and their friends as you turn your big garden into a mini park.

Bury a trampoline

Whether you have a trampoline or not, you’ll know that they’re very popular and entertaining for both adults and kids. Our idea though is to not just have your trampoline as normal, but to bury it in the ground. If you have kids they will love this as it will be so different to what their friends have in their gardens!This will also make the trampoline a part of the garden rather than a huge eyesore!

Get a Greenhouse

Our final idea for you is to get a greenhouse for your garden. If you don’t have one already, greenhouses are great for growing your own plants and vegetables. Why not feed your family and use up your garden space at the same time? Mare sure to take a look at some of our guides on how to make the most of your greenhouse!

Get Started

Although the big space can be overwhelming at first, we think you should implement at least one of these features to get youstarted. Soon, you’ll have a garden full of features to impress your friends with!

Leopard’s Bane: Planting And Care

0

Leopard’s Bane: Planting And Care – If you want to fill a patch of your bed or border with large and yellow daisy-like flowers, Leopard’s bane (the genus Doronicum of family Asteraceae, also known as aconite, monkshood, or Devil’s helmet) is the one to select when you also want earliness — in many herbaceous borders it is this plant which provides the first splash of bright color amongst the herbaceous perennials.

Leopard’s bane is an easy-going plant, useful for getting a flower border off to an early start, or for growing towards the front of a shrub border – it will tolerate a little light shade in your garden. Leopard’s bane involves no particular problems — provide some support for the stems and dead-head the spent blooms.

Leopard’s bane

Keep watch for slug damage and cut the stems down to ground level in the fall. Divide the clumps and replant every three years.

Leopard’s bane varieties

Doronicum plantagineum bears 3 in. flowers – its basic details are height 2-3 ft, spacing ½ ft and flowering period April – June. There are 2 outstanding varieties: ‘Miss Mason’ (2 ft) and ‘Harpur Crewe’ (3 ft). Doronicum caucasicum is a smaller species (1 -1½ ft) with 2 in. flowers – it has produced the fully double variety ‘Spring Beauty’. The smallest leopard’s bane of all is also the first to flower – D. ‘Gold Dwarf’ (6 in).

Doronicum caucasicum ‘Little Leo’

Site and soil

Leopard’s bane is a very uniform plant, so it works well as an edging plant, in garden containers, or in small spaces when planted from flower seeds. Any reasonable garden soil will do – thrives in full sun or partial shade.

Companion plants

Spring bulbs especially narcissus, tulips, scilla; Campanula glomerata, Brunnera, Phlox divaricata, Phlox subulata ‘Atropurpurea’, Mertensia virginica, Pulmonaria.

Propagation

Divide clumps in fall or spring.


8 Great Reasons to Quit Your Job and Become a Full-Time Independent Gardener

0

Working in as an employee in acompany is a rewarding experience that allows one to learn and grow their career while earning a steady income. However, with time, many desire to break free from their employer and work independently. Making the transition from an employee to an independent gardener has a number of benefits, but it can be a hard decision to make.

If you are thinking about quitting your job, below are some of the reasons why it may be a viable option and the benefits you will reap when running your own business. 

Acquire New Skills

Working as an independent contractor will give you a new work experience with more freedom, flexibility, learning opportunities, and earning potential. On the one hand, it will give you the exposure you did not get as an employee. On the other hand, you will have to learn to manage your finances, do some accounting and file your taxes all by yourself. Additionally, you will have to pay for insurance so ensure you find a provider that will give you the best offer on landscape insurance for liability coverage.

However, this should not keep you from starting your business. You can make use of online tools to keep track of your time, incomeand expenses, and hire an affordable freelance accountant to help in preparation of accounting reports and filing taxes. All of these activities help you acquire a new set of skills that you were not using before.

Ongoing Jobs

Getting your first contract can be tough, but once you are established, you will have ongoing work. This is because gardens need continuous maintenance all year long. However, for you to get repeat clients, you have to do a good job. Working will also earn you referrals and grow your business. To get clients for your new business, ensure that you market your services both online and offline. Don’t be shy to ask for recommendations from people you know and once you have completed a job, ask the client for referrals.

Define Your Pay Check

Working as an independent gardener allows you to dictate how much you earn in a month. You can work more hours when you need the extra money. You can also charge your clients different rates per hour depending on the nature of the job.Additionally, you may consider hiring other people to work with you to boost your earning. Thus, when working independently, your income has no limit, unlike in employment where the employer has set a specific salary or hourly rate.

Specialize in What You Like

As an independent contractor, you can choose to specialize only in areas that you love. You get to choose the setups and the nature of work you take. Specializing is a good idea, especially when you want to grow as an expert in a certain field. It gives you the opportunity to grow both in knowledge and experience.

Have Something in Your Name

When you are working for someone, all the credit for the work you do goes to their company’s name. As an independent gardener, you will have the opportunity to put your name out there for all the contracts you complete. It will be a fulfilling experience when you create a brand with your name or any other chosen name on it. This can give you a sense of fulfillment and motivate you to keep on working harder.

Opportunity to Work with Multiple Individuals and Companies

As an independent gardener, you will have the opportunity to work with multiple individuals and companies. This includes both your clients and other professionals. You will gain diverse knowledge and experience working on different projects every day. Additionally, you will have the opportunity to interact with professionals in related fields and strike business deals.

Give All Your Ideas a Try

While most employers give their employees an opportunity to give ideas and suggestions, most of the control and decision-making is done by the management. Some cool ideas can also be overlooked when there are so many suggestions from the rest of the team members. As an independent gardener, you will be in control of the decisions and thus you can give all your ideas a try. However, you have to ensure that you make good decisions that are in line with the client’s needs and will produce good results. Otherwise, it will be hard to get repeat business and referrals from your clients.

Flexibility

As an employee, you work for a specific number of hours and you have to report to work at a specific time each day. However, as a contractor, you are not tied down to the minimum hours you should work or when you should report to work. You get the freedom to plan a work schedule that is most convenient for you.

3 Things You Should Know About Knotweed

0

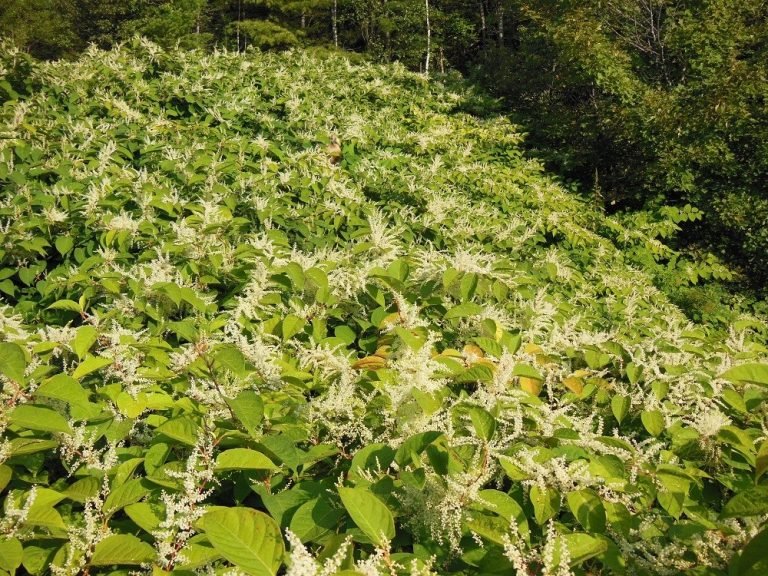
Introduced in Europe by a botanist by the name of Philipp Von Siebold who first discovered it at a volcano site in the Far East at the start of the 19th century, Japanese Knotweed is one of the most destructive plants of all time with the potential to cause real damage to your home. It’s a plant you wouldn’t wish to see anywhere near your property.

Here are 3 things you should know about knotweed:

  1.    Knotweed Grows Deep And High

This clump-forming perennial plant produces stems which grow as high as 3 meters or more at a very fast rate and can reach the top of your roof gutters within the summer season. Its roots can grow 3 meters deep and can spread up to 7 meters horizontally. The stems above the ground are thick with a bamboo-like appearance and have an initial rare purple speckle color which later turns brown before dying off in the winter season.

knotweed reproduces and spreads off by means of its underground stems known as rhizomes. This plant is able to break through weak sections on a concrete wall and on tarmac and is harmful enough to damage drainage systems, a building’s foundations, and walls.

  1.    Japanese Knotweed Affects Property Sale, Mortgage, And Insurance

If you own a property that is infested with knotweed and are planning to sell it, you’re up for a huge hard task. The attributes of this plant drive realtors away from a property infested by it. Mortgage providers may deny you mortgage for the property or may hold back until they are fully satisfied that the plant is completely eradicated from the land.

In addition to that, Japanese knotweed really reduces the value of the property. Insurance companies do not provide insurance covers for damages on the property sponsored by knotweed.

Having the plant on your compound is no offense but you can be prosecuted if the plant goes beyond your property into your neighbor’s space and causes any kind of damage. You, therefore, need to control it.

  1.    Japanese Knotweed Isn’t Easy To Get Rid Of, You Need A Specialist

Getting rid of knotweed isn’t an easy task. DIY attempts to get rid of the plant always end up being unsuccessful. Cutting the plant repeatedly using a lawnmower will not get rid of it as the roots can spread horizontally up to 7 meters under the ground. Cutting it above the ground is of no effect.

An effective way to get rid of knotweed is to dig it up but you have to dig deep to get to the underground roots. The waste of the plant has to be properly disposed of and this can only be done in a landfill site with a permit and only licensed disposal specialists are allowed to do this.

Another option is using chemicals containing glyphosate to spray on the plant but this may take up to three years to completely eradicate. Bear in mind that chemical treatment is quite expensive to do.

Working with licensed specialists will cut the cost a great deal and will ease the process for you since they have the necessary expertise and equipment to get the job done and completely eradicate the plant.

Conclusion

Is your home in danger of being infested by this destructive plant? Find out today. Here’s a map of knotweed across the UK.


Create A Tulip Garden

0

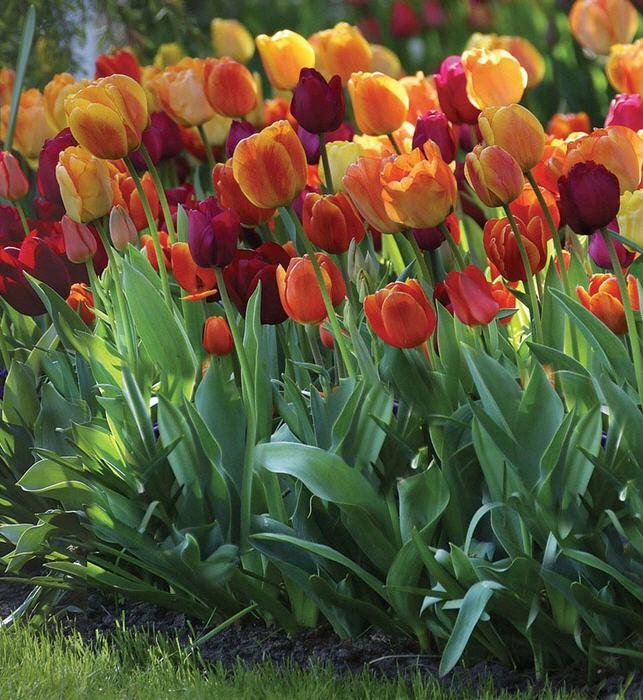
Create A Tulip Garden – Tulips are one of the first flowers to take the spring stage. As the last drifts of snow seep into the soil, these bright signs of spring dance in the sunlight. However, you don’t have to wait for spring to grow tulips. Whether it lies in a bed, under a shrub, in the crevices of a rock garden or in a container, a tulip bulb is an underground flower factory just waiting to “spring up” from whatever soil it occupies.

The whole purpose of a tulip bulb is to flower. In fact, in the center of each bulb, tiny leaves cradle a baby bud. The white, onion-like bulb that surrounds the bud stores all the nutrients that the bud needs to sprout and grow. The only real help the tulip needs to grow is a generous drink of water and some soil to keep it moist.

Tulip garden

Selecting tulip bulbs

When selecting bulbs, a simple rule of thumb is that the bigger the bulb, the bigger the flower. Choose plump bulbs that are firm and heavy for their size. Although the tunic (outer papery skin) need not be intact, avoid bulbs that are withered, overly dry, scarred, and have traces of mold, soft spots, or other blemishes. However, more difficult than selecting bulbs is first choosing from the over 100 varieties of tulips which are divided into 15 divisions. Careful selection from different divisions can help you plan a tulip garden that begins in early spring and dances on through the end of May.

1. Single Early

Short-stemmed tulips (usually about 8-inches high) that flower in late March and early April.

Single Early tulips

2. Double Early

A profusion of petals on 12 to 15 inch stems makes an attractive display when these bulbs are forced indoors. Although they usually bloom from early to mid-April, they are more delicate than some other cultivars and need protection from cold and inclement weather.

3. Triumph

A standard since 1923 when they were named by Dutch breeder, N. Zandbergen, these tulips take the throne at the end of April as they tower to 18 inches high.

4. Darwin Hybrids

One of the tallest garden tulips (usually over 2-feet tall) these red, white and yellow beauties are perfect for naturalizing and are those you generally see returning in established gardens May after May.

Tulip ‘Darwin’ Hybrid

5. Single Late

Originally known as Cottage tulips, these hybrids inter-mingled and successfully merged with Darwin hybrids. Like the Darwins, they grow well over 2-feet tall and bloom in May.

6. Lily-Flowered

Another May-flowering tulip, this group was originally grouped with Cottage tulips but was reclassified in 1958. On stems that grow from 1 ½ to 2-feet tall, long, shapely flowers have pointed petals that most closely resemble native Turkish tulips and boast the first scented tulip, the Ballerina, in their troupe.

7. Fringed

A short (12 to 18 inches) but showy group of tulips that brightens the May garden with ruffles that either mirror or add a contrasting color to the rest of the bloom.

8. Viridiflora

May blooms with a flash of green streaked through their petals, this group of tulips varies from one to two-feet tall.

‘Spring Green’ viridiflora tulips

9. Rembrandt

Once highly prized by gardeners, today these tulips are nearly obsolete. Although streaked with beautiful breaks and stripes of artistic color, it was discovered that this palette was created by a virus that could spread to other tulip cultivars. Although some suppliers still offer the Rembrandt, these tulips are no longer commercially grown and advertised types are generally no relation to the true Rembrandt cultivars.

10. Parrot

A riot of petals that curl in all directions, these blooms look like they could use some preening. However, they aren’t named for their resemblance to feathers, but rather for the bud that resembles a parrot’s beak. A few of these May-blooming cultivars are scented. They generally grow from 16 to 24 inches tall.

11. Double Late (Peony flowered)

Although less resistant to poor weather, peony flowered cultivars are another excellent choice for container tulip growing. From mid to late May, these tall (1 ½ to 2-feet) blooms bear a profusion of petals in close resemblance to their namesake.

‘Kaufmanniana’ tulip

12. Kaufmanniana

If you have difficulty in pronouncing the name of this group, you can also call its cultivars ‘water lily tulips’. Opening flat under the mid-March sun, the foliage of these flowers is characterized by deep purple or brown blotches. Shorter than some other cultivars, the Kaufmanniana is only 6 to 12 inches high.

13. Fosteriana

Greigii crossed with Kaufmanniana “fostered” this division. From 8 to 18 inches tall, these tulips add drama to the April garden with foliage that ranges from grey-green to glossy green.

14. Greigii

Another short (8 to 12 inches) addition to the early spring garden (late March to early April), striking wavy edged foliage provides a perfect backdrop for an eruption of upright blooms that stand amidst a frame of flared-out petals.

15. Species

The last and the least? This group is truly the dwarf (4 to 12 inches) of the tulip family. However, they’re easy to naturalize and their cheery blooms repeat year after year anytime from March to May, some varieties even seeding themselves freely! They are definite proof that good things come in small packages!

Planting the tulip bulbs

Although grown in Holland since the late 16th century, tulips are native to the mountains of Turkey. There, the winters are cold, the spring rains are plentiful and they have cold winters, plenty of water in the spring, and the rest of the year is well… hot! Tulips need the warmth of summer sun to ripen next year’s flower buds. However, they need the cold of winter to rest for their lively emergence in spring.

Generally, unplanted bulbs are difficult to keep over winter. Once evening temperatures dip to 50°F, it’s time to put them in the ground. Fall is also the best time to nourish your tulips. Before you begin planting bulbs, work nutrient rich compost through your soil. Although bulbs will grow in nearly any type of soil, the richer your soil is, the bigger your bulb lift will be next summer. Good drainage is another crucial factor in keeping bulbs healthy.

Plant bulbs two to three times their height. For compact displays, plant them closely together, but not touching. The root side of a bulb is the more rounded side; the pointed side is the part that will open and sprout foliage and flower.

Tulip garden

Container tulip garden

Choose container size according to the height of your cultivar and the density of your bulb planting. Plant bulbs the same as you would garden grown-tulips, making sure there is at least ½ inch of soil below the planting.

Plant tulips for indoor forcing in September and October. Place pots in a cool garden spot (outdoors) and cover them with an inch of clean soil. When top growth is about ½ -inch to 1-inch, transfer them indoors to a darkened area with a maximum temperature of 60°F. Let the stems lengthen for about three weeks and return them to a lighted area with a slightly higher temperature.

Use fresh soil-based potting mixtures only. Peat based mixtures may burn the roots of your bulbs and soil less mixtures dry too quickly.

If putting containers outdoors, protect them from severe frosts particularly when combined with penetrating winds. Store them in a cool area like your garage or wrap with sacking or straw and cover them with plastic bags until the weather is more tulip-friendly.

It is essential to keep tulip containers sufficiently watered. Unlike garden grown plants, those in containers cannot seek for water deeper within their environment. Dry pots result in stunted and shriveled flower heads.

Container tulip garden

Tulip care

When tulips are done flowering, either snip the stem or deadhead the bloom. However, let the leaves die naturally. This is the time the bulb absorbs the nutrients it needs for next year’s growth. When the foliage becomes discolored, remove it to prevent “tulip fire”, which can poison your soil. This is also a good time to lift any tulip bulbs that you want to remove from your tulip garden.

Lifting bulbs isn’t any more complex than digging them out of the ground or dumping them out of the pot. Usually each bloom produces one good-sized bulb and two smaller offshoots that can be discarded. Allow lifted bulbs to dry naturally. Then store them somewhere cool in an airy container (net produce bags and burlap bags work well) to provide good circulation until next planting time.

Tulip problems

When tulips produce foliage but no flowers, the most probable cause is damage caused by slugs or snails. Although liquid slug killers are available from most garden centers, most of them are toxic to beneficial organisms and insects in your garden as well as your pets and your family. The easiest way to deter slugs from invading your tulips is to create a barrier of lava rock or diatomaceous earth around your tulips. Both have sharp edges that kill invading pests by cutting into their skin and causing them to dry up. Another effective way to control slugs is with beer traps. Partially filled cans buried up to the lip will attract and drown slugs.

White tulips in garden border


Why Your Pumpkin Farm Needs A Steel Building

0

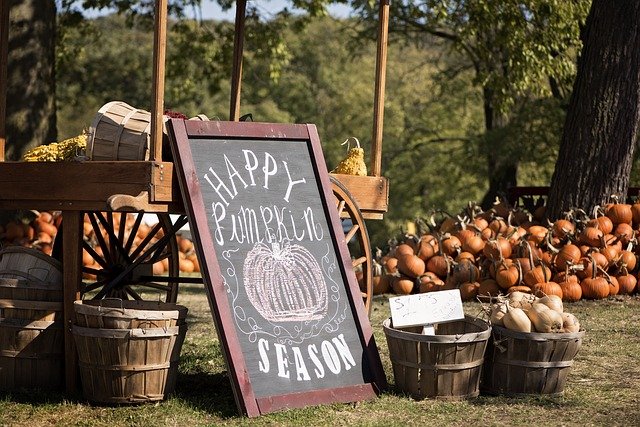
It is never too early to start thinking about pumpkin season as before you know it, October will be here and pumpkin season will be in full swing! Pumpkin season can mean big business, however, you do not need to have a farm to get involved. All you need is a good piece of garden and a steel building. Having a steel building can turn your pumpkin garden from average into a roaring success. If you think that this could be an attractive option for you this Autumn, carry on reading to find out five reasons why you need a steel barn for your new pumpkin garden.

Draw a Crowd with Activities

If you have ever gone pumpkin picking on a farm, then you will already know that this is an eventful family day out and the kids are looking to be entertained! Any good pumpkin garden will offer more than just pumpkins to try and draw in the crowds and activities are a great way to do this. Just a few different things that you can do include haunted attractions and hayrides. We would even recommend that you offer something for the adults too such as cocktail hour as it is, after all, the parents who will be deciding which pumpkin garden to take their children too and any with alcohol available is sure to be a crowd pleaser. Plus, it will also help you to bring in some extra revenue.

Offering these different kinds of activities means you will attract not just pumpkin shoppers to your garden. These different activities all require set up, equipment and shelter, which is where your steel framed buildings will come in handy.  You can use websites such as steelbuildings.co.uk to explore your different steel building options. On this site, you can also get an online steel building quotation to work out whether what you require is affordable.

Include a Petting Zoo

Another reason why you need to have steel buildings as part of your pumpkin garden isso you can include a petting zoo. The kids love petting zoos, and this is a fantastic way to keep them entertained. Steel buildings work perfectly here as you can place goats, ducks and tiny bunnies into them to keep them sheltered.

Build an Orchard

So, what will you do for the rest of the year when it is not pumpkin season? Well, you can always build an orchard! An easy way to keep money rolling in throughout the year is to have a fruit orchard as this can be open for business 365 days. You can have an ever-changing focus for your orchard and this can solidify your name as being a fantastic and reputable place to visit in your local area. You can then keep this fruit produce in your portal framed buildings.

Store Your Produce

Whether you are just planning on opening up your garden for pumpkin season or are taking our advice to open an orchard all year round, you will have plenty of amazing produce that you will need to store and sell. All of this produce cannot just be lying around outside subject to all weathers as this can damage the produce and make it unsellable. What’s more, animals can also get into your produce when it is left outside. Using your steel framed buildings to store your produce is the perfect solution to this and will ensure your fruit and vegetables are kept safe from all of these eventualities.

Hire Out Your Steel Buildings for Events

Looking for other ways to optimise your steel buildings year round? Then why not offer them up for events? Event hosting is now really big business and you can hire them out for weddings, parties and family gatherings, plus much, much more.

Solomon’s Seal: Planting And Care

0

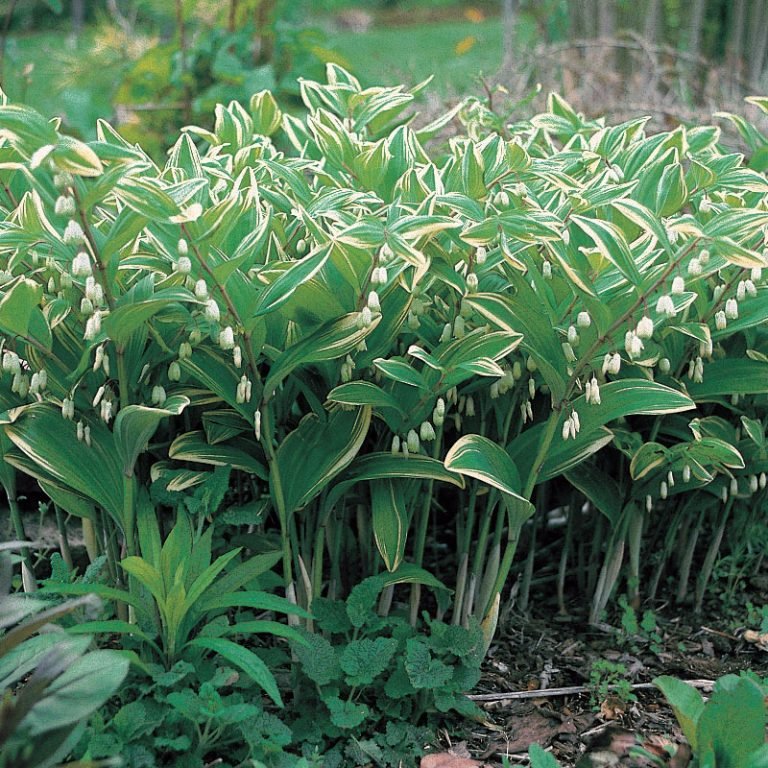
Solomon’s Seal: Planting And Care – Solomon’s seal (Polygonatum) is a shade-loving plant which will thrive in the shadow of trees and shrubs in a mixed border or in the semi-wild garden. The oval leaves clasp the arching stems, providing a graceful and decorative effect even before the bell-like flowers appear in early summer. The green-tipped white blooms are about 1 in. long – small pendent clusters lining the upper part of the stems. The flowering stems are popular with flower arrangers for indoor decoration.
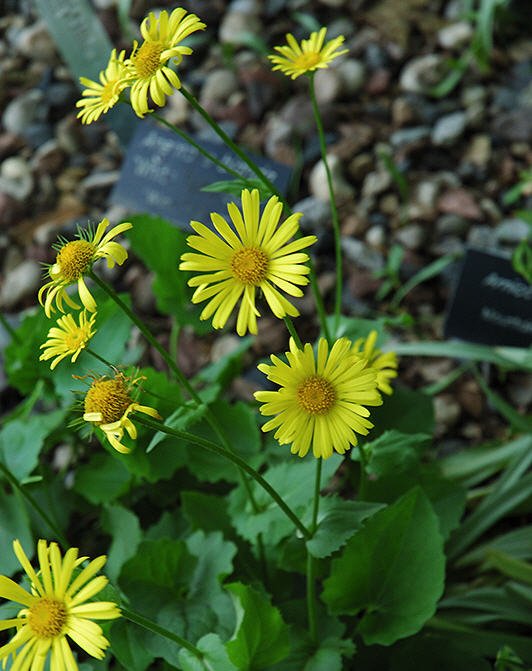
Add compost or peat to the soil at planting time, mulch in spring, water during dry spells and cut down the stems in fall. When Solomon’s seal growing close to other plants, lift and divide every three years.

Watch for sawfly caterpillars in summer – if left unchecked they can skeletonize the foliage in a few days.

Varieties: The one listed in the catalogues is P. hybridum, usually described as P. multiflorum – height 2-8 ft, spacing 2 ft, flowering period May – June. For something different try P. japonicum ‘Variegatum’ (2 ft) which bears green and white striped leaves.

Site and soil: Any reasonable garden soil will do – Solomon’s seal thrives best in shade.

Propagation: Divide clumps in fall or spring.

4 Benefits of Concrete Driveways Over Asphalt

0

Concrete driveways cost somewhat more than asphalt driveways. However, there are a number of benefits to having a concrete driveway over an asphalt one. Here are 4 benefits of concrete driveways over asphalt.

Lower Lifetime Cost

Concrete driveways last, on average, nearly twice as long as an asphalt driveway. So, while it is cheaper to put in an asphalt driveway today, you’ll likely be doing it again in 12 to 15 years compared to the 27 to 30 years for putting in a concrete driveway. Depending on how well you maintain it, it could even last fifty years, such as when you have it sealed every year or two. You can visit https://porch.com/project-cost/concrete-driveway to estimate the cost of installing a concrete driveway.

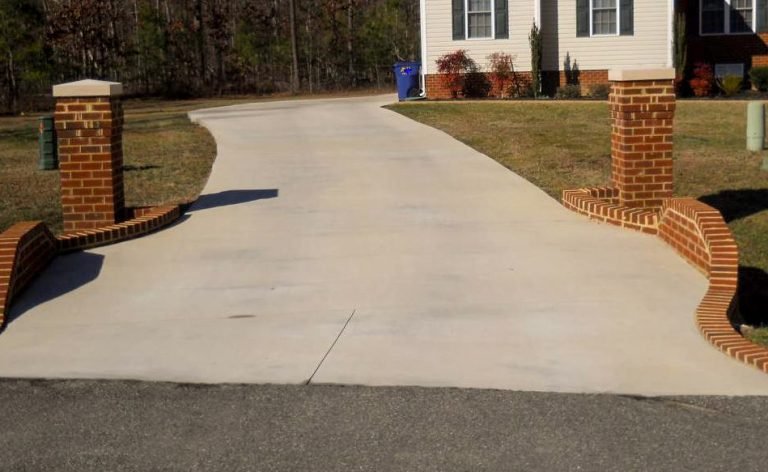
This is the image description

Reduced Maintenance

Maintaining a concrete driveway is simple. It usually needs to be hosed down once in a while. You can choose to have it sealed, and this is a good investment since it protects the concrete from the elements. But you don’t have to do this every year, and if you don’t do it at all, the concrete driveway will still last longer than one made from asphalt.

Another benefit of concrete driveways is that it isn’t going to degrade on exposure to various petroleum products. You don’t have to clean up spills of motor oil and gasoline before it damages the asphalt driveway. There’s no such problem when you change the oil on your concrete driveway. This is aside from the fact that you’ll never have to worry about the asphalt getting so hot that it becomes sticky, potentially damaging your tires or shoes, or just leaving nasty black streaks as you pull into the garage on a hot summer day.

Versatility

If you want the concrete driveway to look like one made from paver stones, it can be stamped with imprints to give it exactly that look. If you like the look of a rock driveway, you could have a layer of pebbles embedded in the concrete while still having a more durable surface than asphalt, all while knowing you’ll never end up with the muddy mess gravel driveways can turn into. You could have colorants mixed into the concrete so that it resembles the soil or reflects your artistic tastes.

It Handles the Heavy Loads

This is one reason why highways are made from concrete and not asphalt. An asphalt driveway is prone to being permanently deformed when you park heavy vehicles on them. Even a bike or motorcycle kickstand could indent the surface. Dolly wheels for trailers have to be put on pads to prevent indentations on the surface if you have an asphalt driveway.

Concrete driveways don’t have this issue. Likewise, a concrete driveway won’t get scuffed if someone with power steering is turning the tires while the vehicle is stationary. Compare this to the warnings that you shouldn’t let the bike kickstand rest on the asphalt early in its life if you don’t want it to show.


Concrete driveways have a lower lifetime cost compared to asphalt driveways. Concrete driveways need less maintenanceand are quite versatile, so you can have them look like almost any type of material.

5 Reasons that Biodynamics and Tree Management are Important in 2018

0

The world has gotten so industrialized that it is about time focus shifted to taking care of the environment that the new age is destroying. The numbers of automobiles on roads are in their millions. The smoke from companies is also on the rise. Given that most of the foods that have the best nutrients are extracted from the ground calls for a need to better manage trees and employ biodynamics all over. Biodynamic agriculture pays attention to all the components of the environment such as soil fertility, the growth of plants, and best care to animals since they are all correlated. Below are some of the reasons to employ both biodynamics and tree management.

1) Fresh Air

A perfect lawn full of good trees brings in a good feel of fresh air in the environment you are in. Trees are known for cleaning up the air. Nowadays, it is very hard to be in an environment that is not filled with smoke, dust, or other pollution. This makes you appreciate fresh air more. It is just better when you can find it within the confines of your home. It makes a place fun to relax and be able to rejuvenate after a long day or week of a busy schedule.

2) Aesthetic Value

Most people prefer a good landscape that can only come with quality tree management. Sometimes, the trees block flowers, the house, or swimming pools that need to be trimmed. The good thing is that Joe Stevens does an excellent job when it comes to doing all things revolving the maintenance of trees. His team is known for performing thousands of tree works in homes over the years. Hence, the experience comes in handy when you need people who will not damage the property and will not force you into rushing a decision.

3) Fighting off Climate Change

If everyone did their role of taking care of their environment, it would help manage climate change. All data indicates that the world is in danger. Most plants are becoming extinct because of the fast rate that the climate is changing. Planting trees, taking better care of plants within our reach, and minding pollution will give us an improvement in the overall climate.

4) Increase Property’s Worth

Most people buy property that has been well-maintained in all aspects, especially on the landscape aspects, since it improves the aesthetic value. Property that is in an environment that has good tree management and biodynamics is guaranteed to have a very high market price. A beautiful home stands a better chance when being advertised or when it is put up for sale.

5) Water infiltration

Good tree management is always a good idea. Maintaining the hedges increases water infiltration in a home. Surface runoff is also highly reduced in the process. The undertaking can also serve a greater purpose since it reduces the rate at which water reaches water bodies like rivers, therefore, minimizing chances of flooding cases in a given area.

Container-Friendly Garden

0

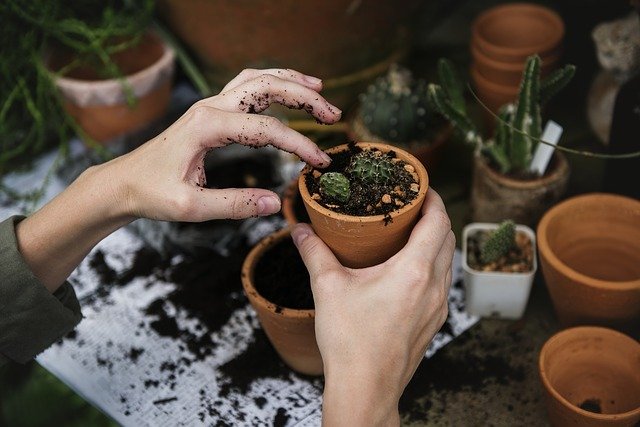
Container-Friendly Garden – Running short on garden space or living in a small urban apartment should not necessarily stop you from having a thriving and beautiful garden. You can actually turn any available place into a gardening spot – from balconies and rooftops to windowsills and empty walls. Growing plants in containers provide numerous opportunities for gardeners with limited space. You can go even further and grow your own veggies and fruits and to experience the flavor and the benefits of home-grown food. With a few pots and the right plants, you can create your own container-friendly garden.

Container-friendly gardening

About container gardening…

It is a little known fact that most vegetables can actually grow pretty well in containers. Fruits offer fewer options, but you can still find suitable options. Тhe key to successful container gardening is picking the ideal plants for your small garden. Here are a couple of things you need to consider before you start with your garden:

– The first step is to pick a spot for your container garden. Vegetables thrive best in areas with windowsills. If you live in a warmer area, you can keep your fruits and veggies on the balcony or rooftop.

– The size of the container is essential. Generally, the bigger the pot, the better. Larger containers hold more soil and thus more nutrients and moisture. Get a pot that is at least 12 inches deeper and 10 inches wider. Again, it depends on the type of the greenery you are planting.

– The soil is another important aspect of container-friendly gardening. Make a safe bet and get potting mixes for containers.

– Veggies and fruits require a consistent supply of water to develop well.

If you are looking for easy to grow fruits and veggies for your container-friendly garden, you can try these plants:

1. Tomatoes

These easily raised crops are a popular choice for container gardening. Tomatoes would love a sunny windowsill or balcony and can be grown from seed or small plant. For hanging baskets and window boxes, you can select pendant varieties such as Tumbler tomatoes. Other varieties you can consider are Matt’s Wild Cheery, Jelly bean and Yellow Pear.

Container-friendly garden: Tomato

2. Carrots and radishes

Although most root veggies need more depth that you can provide indoors, you can pick miniature or round varieties that don’t root deeply. Round radishes and baby carrots will grow well in pots, pans and boxes. Pick a sunny spot, with at least 8 hours of direct sun. Fill the container with sandy potting soil and ensure it has good drainage. Fight off the fungus by watering with camomile tea.

Container-friendly garden: Radishes

3. Avocado

Avocado is another popular indoor plant, because it requires minimum efforts and produces delicious fruits. You can grow it from avocado pit, but keep in mind that it may not yield edible fruits. The alternative is to buy a dwarf avocado plant. The greenery can grow more than 10 feet. Re-pot the plant if needed by filling the container with sand and then with potting mix. Don’t forget to make drainage holes. Put your avocado in the sunniest spot you have and water regularly, but be careful not to overwater.

Container-friendly garden: Avocado

4. Lemons

You can easily grow lemons from seed and keep it indoors in well-drained pots. These plants can reach up to 20 feet in height, so you are better off getting a dwarf version such as Meyer lemon. The lemon trees need a whole lot of sun and will grow best in a room or balcony with southern exposure.

Container-friendly garden: Lemon

5. Microgreens

Microgreens are a great container growing option. You can start with a seed mix that includes a variety of tiny delicious plants such as basil, radish and dill, Swiss chard, mesclun salad greens or anything you like. Sprinkle the seeds over a shallow tray filled with potting mix and then cover with a thin layer of soil. Water the soil by using a spray bottle and put the tray on a sunny windowsill. The seeds should germinate in 3 to 5 days and the veggies will be ready to consume in 10 days.

Container-friendly garden: Microgreens

Container-friendly garden: Microgreens